We’re thrilled to reveal the new Chorus D Bundle for Virtual Mix Rack, featuring the new SD-D Chorus and Custom D Chorus modules. Based on a classic chorus introduced in the late 1970s, this iconic effect defined the sounds of Brian Eno, Kate Bush, and countless others.
Now, the Chorus D Bundle represents the first introduction of modulation effects to the VMR lineup.
SD-D Chorus is a 1:1 recreation of a beloved chorus from the late 1970s. Featuring the four modes from the original hardware, users can also experiment with different combinations for more sonic possibilities. The intensity of the effect can be adjusted, too—something that wasn’t possible on the original hardware.
If you’re craving that coveted 80’s chorus effect, this is the module for you.
Custom D Chorus takes the classic tone of the original hardware and gives users an unprecedented amount of control over their resulting signal. They can adjust the depth, delay, and rate of the LFO to their taste, set or bypass the cutoff frequency of their effected signal, adjust the shape of the LFO, or even randomize it for a totally unique result.
With Custom D Chorus, you can morph one of the most famous effects of all time to suit your exact needs.
About Virtual Mix Rack
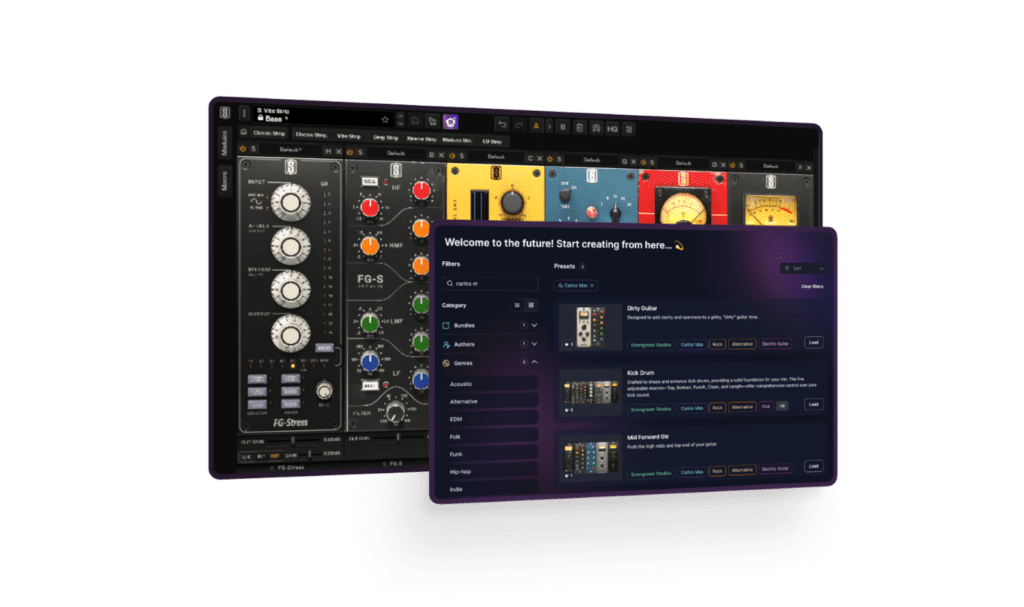
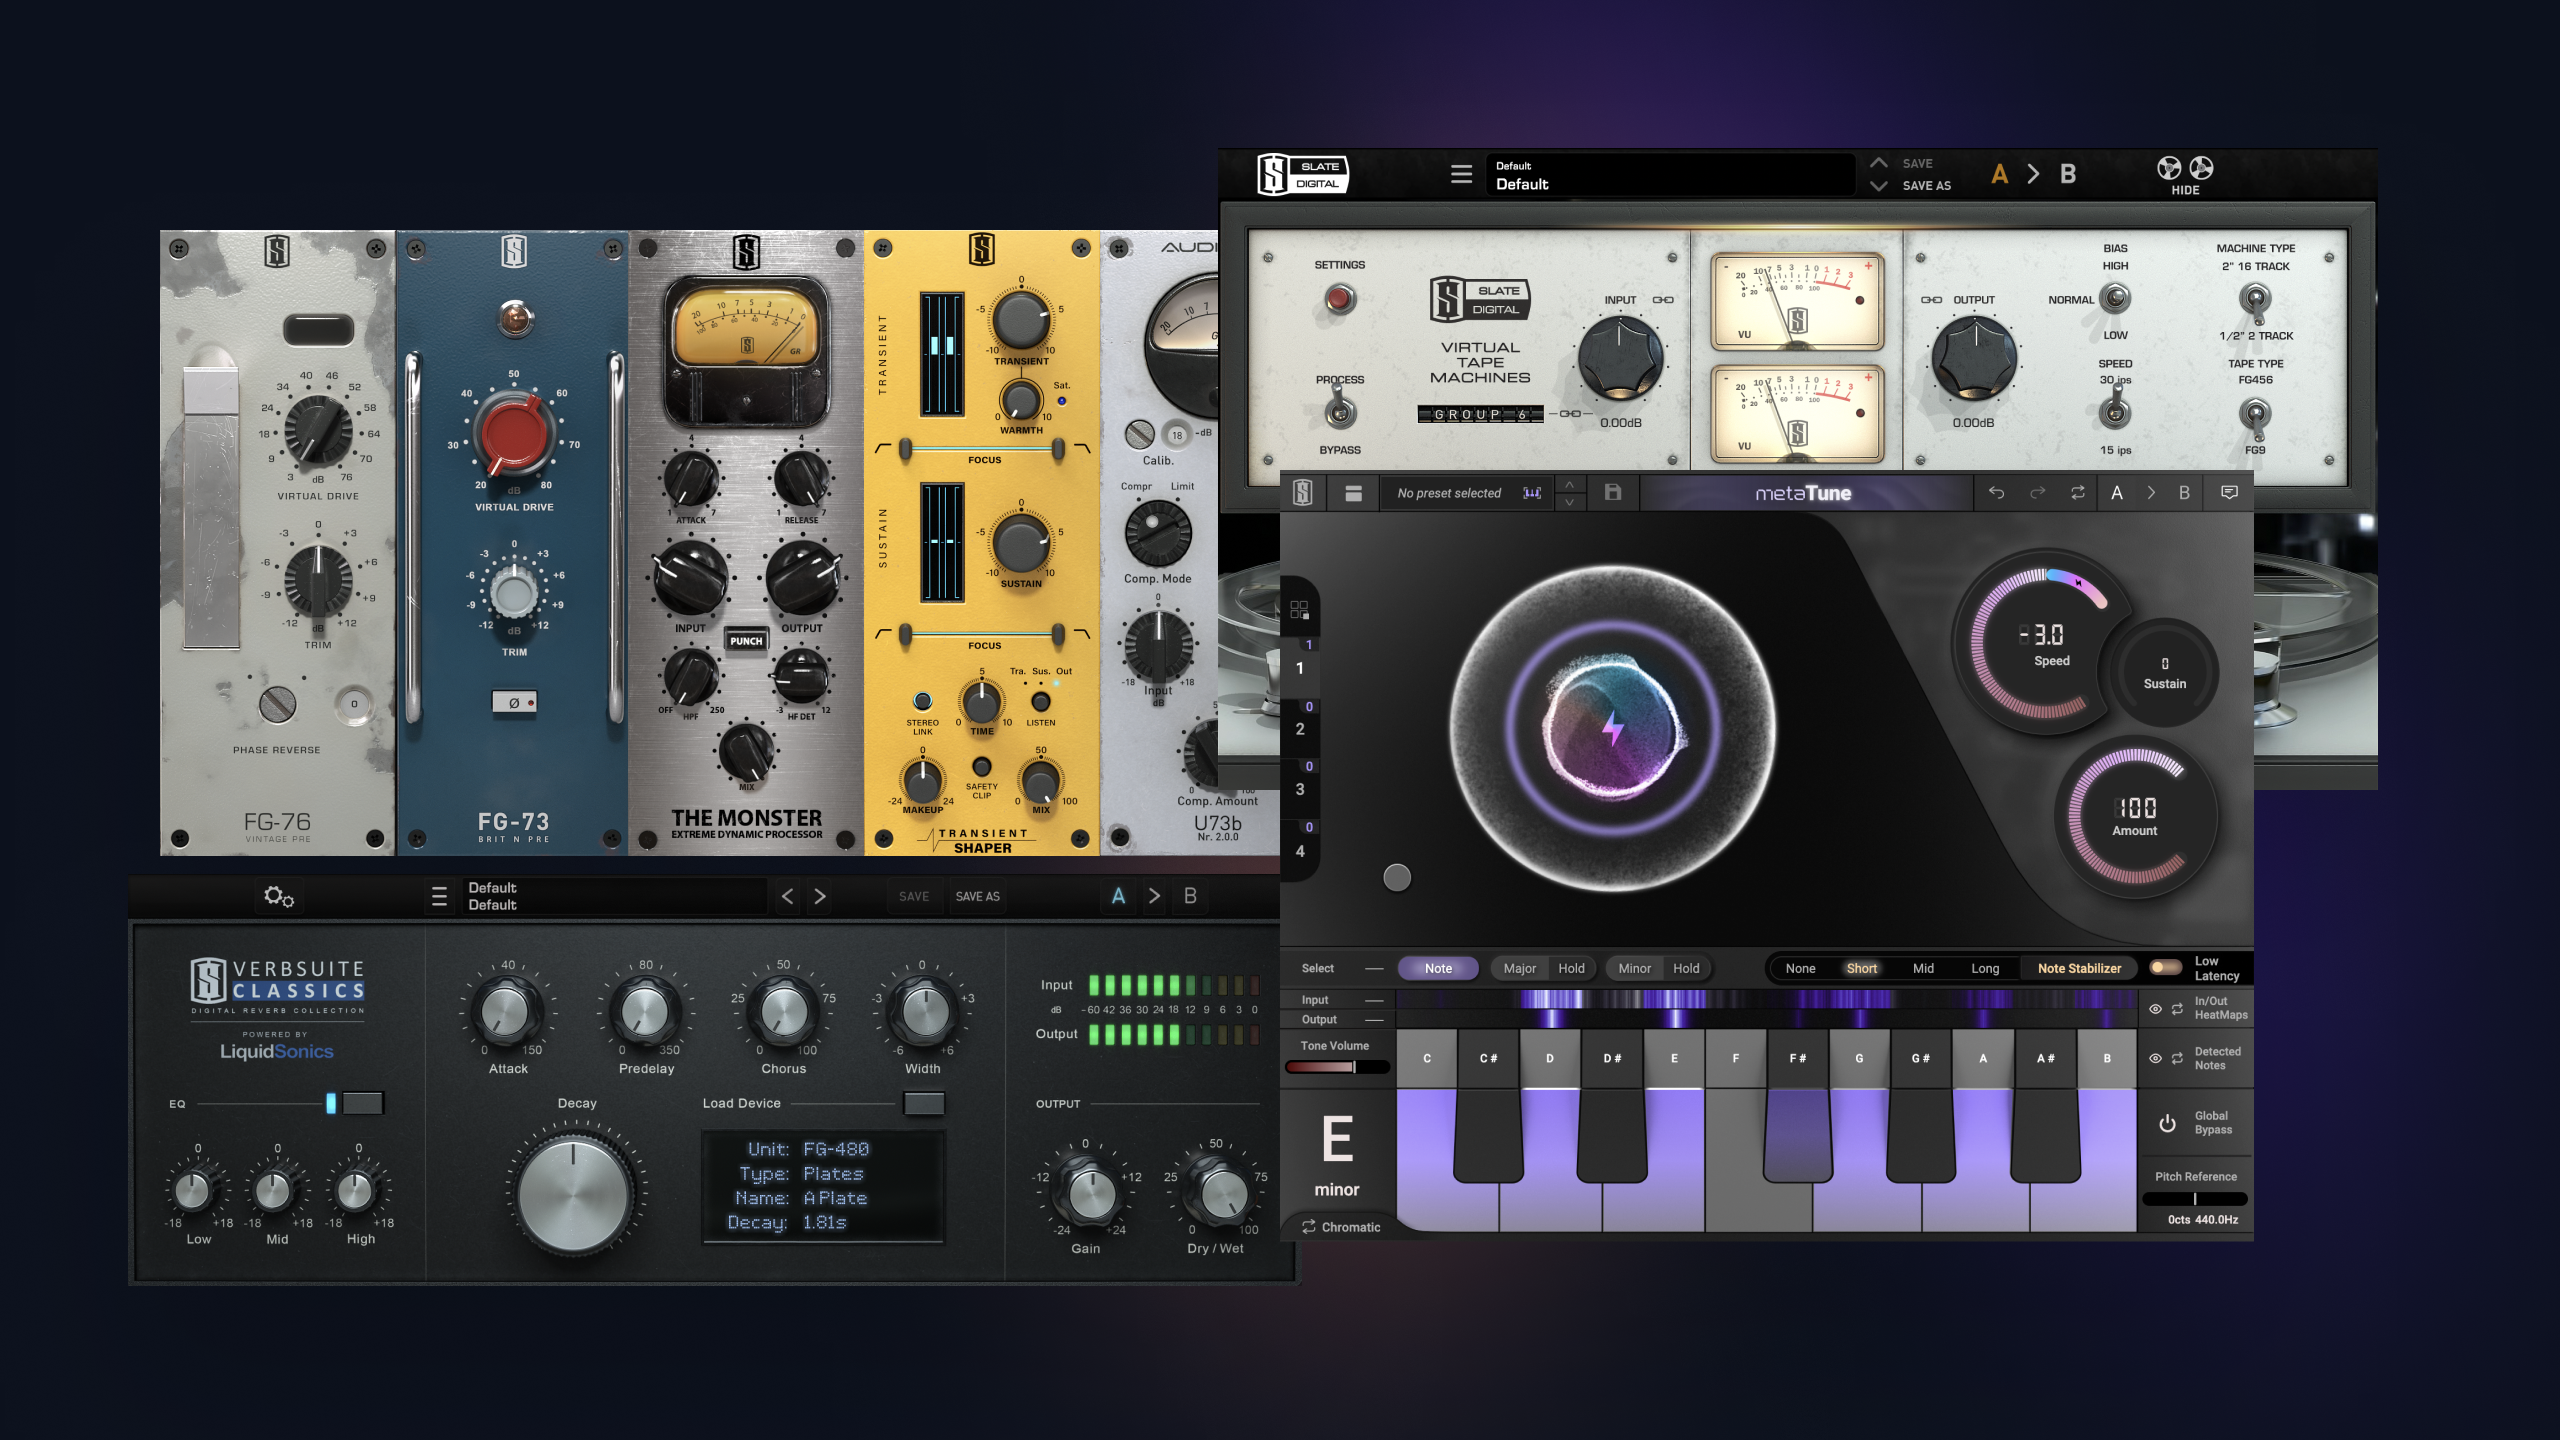
Virtual Mix Rack (or ‘VMR’) is Slate Digital’s flagship mixing plugin that packs over 40 analog modules into a single intuitive digital workspace. Late last year, the company released Version 3.0, an update that introduced a new macro system, a comprehensive preset browser, external sidechain, individual module gain staging, and interface scaling that provides users with an optimized viewing experience. With the Chorus D Bundle, VMR gains yet another level of utility.
How to Get It
Current All Access Pass and Complete Access Bundle subscribers can access the Chorus D Bundle modules now! Update Virtual Mix Rack and try them out today.
Some people are born to be in the studio. One of those people is Thomas Warren.
Unlike those in the music world who come from a family of musicians (professional or otherwise), Thomas naturally found his way into the business. From learning foundational production principles by rebuilding beats to interning at major studios, Thomas found a way to turn his passion into a career, leading to a discography that features names like Rihanna, Kendrick Lamar, Sam Smith, Dominic Fike, and Prodigy of Mobb Deep, just to name a few.
Thomas recently took some time to sit down and talk with us about his career beginnings, his favorite part of the production process, and some key things engineers should know to set themselves up for a successful future in the industry.
Drew Van Buskirk: Thanks for sitting down with us, Thomas. For those who might not be familiar with you, could you give us a quick introduction?
Thomas Warren: Yeah, of course. I’m Thomas Warren, a mixing and recording engineer based in Los Angeles. I’ve been doing this professionally since around 2012. I got my start by attending the Conservatory of Recording Arts and Sciences, then did internships at places like Quad Studios and Premier in New York before moving to LA.
Once I got to LA, I spent several years working at Westlake Studios and with Stargate before transitioning into full-time mixing. Over the years, I’ve been fortunate to work on a range of projects spanning hip-hop, R&B, and pop, collaborating with some of the biggest names in the industry.
DVB: Did you grow up in a musical household? Were you ever in bands, or were you always drawn to production?
TW: I didn’t really have family in music. Some of my uncles in England were into metal, but I was never in that world. I was more into production and hip-hop. I played piano growing up and did some production work before getting deeper into engineering. I remember being fascinated by the way beats and melodies came together, and that naturally led me into studio work. I was always trying to reverse-engineer my favorite tracks to understand how they were put together.
DVB: What was your ‘light bulb’ moment when you knew you had to work in a studio?
TW: I’ve always been drawn to music — I’d fall asleep listening to it, constantly messing with sound. But the real moment came when my mom had a friend whose husband was an engineer. He’d worked with Bone Thugs, Korn, and other artists. I visited his studio in high school and just thought, “How do I do this?” One of the guys there told me about the Conservatory. The second I walked into that school and saw the plaques on the walls, I knew. That was it. It was a moment of absolute clarity—this was where I needed to be.
DVB: What was your first big project, or at least the first one you handled on your own?
TW: That would be working with Prodigy from Mobb Deep at Quad Studios. It was my first real solo engineering session. I was originally scheduled as the second engineer, but the lead engineer didn’t show up, so I had to step in.
I was nervous — I grew up listening to that kind of hip-hop — but Prodigy was super cool, even teaching me things along the way. He was patient and really helped me build confidence in the moment. Looking back, that was one of those defining moments where you realize you’re truly in the game.
DVB: That’s wild. Sounds like one of those classic music industry moments where you either step up or miss out.
TW: Exactly. It happened again when I worked on Dominic Fike’s “Mona Lisa” for the Spider-Man soundtrack. I was with Stargate at the time, and they knew I wanted to mix more. They just said, “Hey, can you throw a mix on this? We need it right away.” I dropped everything, mixed it in three hours, sent it off, and it was approved. You just never know when those opportunities will come. That’s why it’s so important to always be ready.
DVB: Is that kind of last-minute chaos common in this industry?
TW: All the time. Just the other day, an artist booked me for a session the next night, and I had three other projects I needed to finish beforehand. It can be overwhelming, but it keeps things exciting. No two days are ever the same. The unpredictability is what makes it thrilling: you’re always on your toes, adapting, problem-solving, and pushing your creative limits.
DVB: What was the first huge project that really put you on the map?
TW: That would be ANTI with Rihanna. I spent two years on that project, starting at Westlake, then moving to a big mansion in Malibu to finish it. I worked closely with Kuk Harrell on vocal production and learned a ton from her engineer, Marcos. We probably went through two or three albums’ worth of material before settling on the final version. It was intense — 17, 18-hour days — but such a valuable experience. Seeing how Rihanna worked, how meticulous she was with every element, was inspiring. It taught me how much precision and effort go into crafting a truly great album.
DVB: That’s incredible. Any other major sessions that stand out?
TW: Working with Kendrick Lamar on Mr. Morale & The Big Steppers was amazing. He booked out Stargate’s studio while they were on break, and we had all the rooms going at once with top producers. Kendrick is one of the easiest artists to work with: super focused, great energy. He has a clear vision and an intense work ethic, which makes the whole process smoother. The way he approaches storytelling through sound is on another level.
DVB: What’s the biggest lesson you’ve learned in your career?
TW: The biggest thing is that skill gets you in the room, but your personality and ability to adapt keep you there. You need to be able to work with all kinds of people, handle different personalities, and know when to step up or step back. The technical side is always evolving, but relationships are what sustain a long career. It’s not just about being a great mixer, it’s about being someone that people want to work with again and again.
DVB: Is there a specific part of the process you love the most?
TW: Mixing. I love being the last person to touch a song before it goes to mastering. It’s where I can really bring everything together and add that final touch. The details matter, and I love refining every element until the track sounds exactly how it should.
DVB: Ok, let’s talk Slate Digital. I’d love to know how our plugins fit into your workflow.
TW: I use Slate Digital every day. The SSL plugins are in my mixing template, and I love the Virtual Mix Rack. Fresh Air is amazing, and the FG-DS 902 is a hidden gem for high-end smoothing. I also use VerbSuite all the time for reverb, it’s really versatile. It’s a key part of shaping the depth and space in my mixes.
DVB: Sounds like you’re super familiar with our lineup! Any underrated plugins you’ve found cool uses for?
TW: The Monster compressor is awesome for parallel processing, especially on drums and ad-libs. And I just started messing with the FG-401 compressor, I really like its transformer option. It adds a nice warmth and character.
DVB: Taking notes for my own future use (laughs). Before I let you go, any parting words of wisdom for young engineers just starting out?
TW: Stick with it. This industry takes time. I graduated in 2011 and only started full-time mixing two years ago. A lot of people don’t make it because they expect instant success. If you’re committed and willing to hustle, you’ll find your way.
Kaleb D. Allen is a Grammy-nominated recording engineer who has a hand in some of the most culturally impactful records of the past decade. A Musicians Institute graduate and certified Pro Tools expert, Kaleb currently serves as engineer for producer and songwriter John Shanks.
Kaleb’s discography is littered with legendary names, including Sting, Shaggy, Hozier, Adam Lambert, Dolly Parton, and many more. In 2023, Kaleb received a Grammy nomination for Best Reggae Album of the Year for his contributions to the collaborative album Com Fly Wid Mi by Sting and Shaggy.
Despite his very busy schedule, Kaleb recently took some time to sit down with us to talk about his early beginnings, his best advice for up-and-coming engineers, and some of his core recording principles.
Alright, first things first. Tell us who you are, what you’re all about, what you do, etc.
I’m Kaleb Allen, and I’m predominantly a recording engineer. I started out as a drummer in local bands, and since I was usually the one handling our recordings, I naturally got into engineering. Over time, I connected with other musicians and pursued session drumming, taking any opportunity, big or small, to be part of the creative process. One of my first gigs was at Echobar Studios, run by Eric Rikers. As soon as I stepped into a fully-equipped commercial studio, I thought to myself, “This is way cooler than playing drums.”
That moment led me to Musicians Institute, where I took an accelerated audio engineering program that gave me a solid foundation. A few years later, I fully committed to the craft—getting into studios, mastering Pro Tools, learning proper session etiquette, and pushing myself to make recordings that measured up to the records I admired.
How did you finally get your foot in the studio door as an engineer?
My first studio experiences were unpaid internships—literally mopping floors for free—but I was hungry to learn. Chris Montgomery at Tangent Recording and Louis at 17th St. in Orange County gave me my first opportunities.
My first real studio job came at NightBird Studios in West Hollywood. I applied as an intern, but the studio manager, Mike, needed assistant engineers immediately. I had no experience, but he took a chance on me, and I got paid to learn on the job.
That role threw me into a steep learning curve—grasping studio operations, mic selection, and most critically, signal flow. I quickly realized how little I knew until I had to perform under pressure.
That’s a fascinating journey.
I had an unconventional path in this industry, for sure. I worked at two studios simultaneously—NightBird and United Recording. It was a huge conflict of interest in retrospect, but both teams were supportive and let me make it work. I’d spend the first half of my day as a runner at United, then head over to NightBird from 4:30 PM to 1:00 AM. I’d get up at 5 or 6 AM and do it all over again, day after day, for nearly two years.
I wouldn’t change a thing about that experience. It fueled my passion for this industry and provided an incredible education—one I was fortunate to get paid for. It allowed me to support my daughter while pursuing my dream. I was a late bloomer in this field, not truly committing to it until just after my 30th birthday, but once I did, my trajectory was fast.
It also confirms my theory that a lot of drummers end up doing studio work. It makes sense that would be a relatively natural transition.
Absolutely. Many of the engineers I admire started out the same way. Growing up, I was obsessed with how drums sounded on records. Then, once I got into recording, I realized I had no idea how they actually achieved those sounds. I was obsessed.
That curiosity and drive is what fuels the journey. It’s essential.
Definitely. That’s what got me through those years—momentum from people taking a chance on me, and my own passion for learning and improving. In the early days, being a runner can be demoralizing. Some days, you just want it to be over, and you question if you’re making the right choices. But then, the next morning, you can’t wait to do it again. That’s when you know you’re in the right place.
What was the first big session that you were in charge of?
The first big session I was in charge of was at NightBird Studios. I saw on the schedule that Sting was coming in, and I thought, “Oh, I’d love to be a part of that.” I ended up engineering that session, and we hit it off right away. It was an amazing experience. Those sessions kept happening, and they kept asking me back, which was incredible.
That first session at NightBird was when I realized, “Oh, I might actually be good enough at this to earn the confidence of people who have made some of the records that shaped how I listen to music.”
That’s amazing. Are you still working with Sting today?
Yeah! We actually just did a session at EastWest not too long ago.
I listened to The Police obsessively growing up—not just because of Stewart Copeland’s creative drumming, but sonically, everything about those records was formative for me. Same with Sting’s solo career. So to be invited into that world, when I had so little confidence at the time, and then to have them say, “Yeah, that was great, thank you….”
That had to have been so surreal.
Big time.
And thankfully the whole “don’t meet your heroes” thing didn’t prove true.
Absolutely. In my experience, the truly successful people—the ones with long, legendary careers—are usually the most chill. They’ve already done it all, and they’re often focused on other things. There’s no need for a big display about who they are or who they think you should think they are. Not to say there’s zero ego — I’ve had some nightmare experiences. But most of them weren’t with the legends. They’re largely decent people.
I imagine there’s more to gaining their respect than just technical ability; it’s also about understanding studio etiquette.
Oh, definitely. That’s key.
For people just getting into the business, what are some basic studio etiquette tips that would help them early on?
The biggest lesson I learned, through hard-won experience, is to keep your knowledge to yourself at first. A lot of runners and assistant engineers are eager to show how much they know, which comes from enthusiasm and wanting validation. I get it. But that’s not always appropriate.
Part of studio etiquette is understanding that you’re there to serve the process. If someone wants to know what you can do, they’ll ask.
That makes perfect sense.
Trying to shoehorn yourself into situations rarely works. The best opportunities happen organically, not because you’re pushing to prove yourself. If you try too hard to insert yourself, it can create an unbalanced dynamic with whoever you’re trying to impress.
It’s much better to let your work speak for itself. If people see you as someone who listens, who provides a service, and who contributes positively to the environment, you’re already in.
And if you’re doing great work, people will notice — you shouldn’t have to say it out loud.
Yes, 100%.
What was the first time you really noticed how mic placement or studio conditions made a major difference in the recording?
Oh man, that’s a great question. It happened while working at United Recording. That studio—formerly Ocean Way—has an incredible legacy. Some of my favorite records were made in that building, with that gear, in those rooms, using those microphones.
Coming up as a drummer, I was always trying to figure out how people got these incredible drum sounds. One day, we had an expertly mic’d drum session at United. The kit was in a good spot in the room, the mics were placed well, everything was in phase, and the players were great. I pushed the faders up in the control room, and suddenly, there it was. I realized that so much of the sound I had been chasing came from the recording environment itself.
How do you approach or assess different rooms for… like, how do they affect mic placement? How do you assess that from the get-go?
It all depends on the source. With loud instruments or amps, I have to consider the room, mic choice, placement, and polar pattern. Many assume any cardioid mic will work and that bleed is always bad, but that’s not true. Al Schmitt’s *On the Record* highlights how bleed can be beneficial if managed properly.
Loud sources also create strong reflections, which can be useful or problematic. High ceilings help avoid harsh reflections, unlike a low seven-foot ceiling that bounces sound back too quickly. Every variable—room, source, and mic choice—shapes my approach.
Mic placement always comes first, even before EQ. If I’m miking an acoustic guitar, I’ll move the mic while listening in headphones to shape the sound. Need more high-end? Adjust the mic. Need a different tone? Swap it out. Not every studio is going to have your dream mic waiting for you, so adaptability is key.
Right.
That touches on things like the ML-1A and the ability to really get those flavors out of all the different microphones. These days, the options are virtually endless. I’d advise anyone trying to get into this to go through different microphones. If you have the ML-1A, try different microphones before you touch an EQ.
The function of EQ is to change phase relationships within all the harmonic and fundamental frequencies of a given source. If you’re notching stuff all over the place, you’re going to end up with something that doesn’t sound like the instrument you’re recording. And then when you listen to it in context or solo it, you’ll wonder why it doesn’t sound the way you want it to. It’s because you’ve butchered the characteristics of what makes that instrument sound like itself. If you can get the tone and color you want with just the microphone and mic placement, it’s unbelievable how well things fall together in the mix later.
Do you have any hard and fast studio rules that you find apply no matter what room you’re in or who/what you’re working with?
The most important thing is ensuring the artist has full control over their headphone mix. Whether through Pro Tools or a console, they need a great mix to feel inspired and deliver their best performance. I can’t fix a bad take after the fact—performance comes first. When the artist hears exactly what they need, I just hit record, and the magic happens. In every great session I’ve had, the common thread was a stellar headphone mix. When that’s right, the rough mix at the end of the day already sounds incredible.
Are there any unique things you’ve discovered in the studio involving mic placement scenarios where you got a result you didn’t expect?
This ties back to understanding mic polar patterns. Many engineers default to cardioid for a direct, in-your-face sound, especially on vocals. But that often introduces proximity effect issues—too much low-mid buildup, leading them to notch out 200 Hz or have the artist back up. The problem? As soon as the vocalist moves away, you get more room sound, and the recording loses its tight, focused quality.
A better solution is switching the mic to Omni or Figure 8 in a dead room. This naturally reduces the proximity effect without relying on EQ, preserving clarity while still maintaining a sense of directionality. I first noticed this trick by experimenting, then later confirmed it through some great research. Omni mode, in particular, works wonders for eliminating low-mid muddiness while keeping the vocal presence intact.
The less EQ I need after the fact, the better the recording will sound. Getting it right at the source always wins over fixing it later.
How big a role does experimentation play in your day-to-day workflow?
That’s a good question. I’d say only about 20-25% of the time. More often than not, when I’m with the artist and producer, it’s pretty much go time. They have the things they want in my workflow.
When it comes to the mixing side, that’s where experimentation really shines. When it’s just me in the room and I’m twisting knobs, that’s when it’s time to experiment. I can be subtle and sneaky about being experimental during tracking, but if I’m being truthful, it’s not all that often. It can be difficult to jump out on a limb while people are being creative and want to track right away, especially when they have a tight schedule. That can be tricky.
Experimentation must be much more important in the learning phase, right?
Yep, absolutely. Taking time for yourself before or after the artist is in the room to experiment is a good idea. I’d suggest doing it after the session. I’ve tried experimenting before a session, and then I forget what I did when the session starts. That ends up being a roadblock later.
Gotcha.
So my more specific suggestion would be to record some good material during the day and then experiment with it afterward. That’ll help inform the next session, whether it’s with that artist or not. Even if I’m tired or have ear fatigue after the session, it’s a really good time to take inventory of what you’ve done and try changing up a few things. It’s a good fail-safe to wait until after the session to get experimental.
Do you ever switch microphones mid-session to capture a specific vocal effect, or do you typically stick with one mic and adjust its placement to achieve the desired sound?
I’d say the latter; that’s always going to result in a drastically different sound. Even a slight movement, especially if the mic is in cardioid, will have a discernible difference on tonality. Dave Pensado talks about using different microphones for lead vocals versus background vocals for the same vocalist, and that works well.
What are some common pitfalls that both new and experienced engineers can avoid to help enhance their workflow in the studio?
Oh, that’s a good one. I’d say always take the time to ensure everything works—especially the gear you’ll be using. Check inputs, Pro Tools settings, DSP modes, and hardware inserts before the session starts.
If you’re in a new studio, don’t wait until the artist arrives to troubleshoot. I’ve seen too many engineers skip prep because they’re not getting paid for setup time. But being prepared leads to smoother sessions, better results, and more callbacks from artists and studios.
If you’re focused on squeezing every billable second or just feeling lazy, take a step back. The worst time to discover a broken mic capsule is when the artist is already in the booth. Preparation prevents those disasters, so do the work upfront.
Being early is being on time.
Absolutely.
If you’re working entirely in the box or find yourself in a studio setup that’s lacking some essential tools, are there any plugins that you consider especially beneficial?
The Virtual Mix Rack has been a game-changer for me. I use it in every session, even for rough mixes. That and Virtual Tape Machine are my go-to plugins. I don’t have a tape machine, but the Virtual Tape Machine gives me that warm, vintage 2-track vibe I love, especially with the half-inch setting. It adds the perfect low end without needing the real thing.
In-the-box tools have come a long way. It’s not 2006 anymore, where you’d spend $700 on a plugin and hope it works. These days, the quality is solid, and having access to top-tier plugins in both commercial studios and my home setup is a luxury. I can take all my mixes and plugins with me wherever I go.
For the purists out there: I get it, I was one too. But these tools sound incredible and work on everything. The saturation from the Virtual Mix Rack and Revival, combined with the Virtual Tape Machine, gives me the warmth and vibe I need, without the hassle of preamps or renting a tape machine. It’s all super convenient.
How do you avoid getting stuck in a cycle of overthinking and over-the-top processing chains?
For me, avoiding over-processing and option paralysis usually happens after I’ve already gone too far. I’ll listen back, bypass some plugins, and realize, “Oh, it sounds better without the 900 things I just added.” Luckily, I’ve gotten quicker at recognizing it now, but it’s part of the process.
The great thing about working with plugins is that you can always go back and undo things. You don’t have to commit until the final mix is sent off to mastering. It’s OK to realize after the fact that you overdid it. As long as your mic placement is solid from the start and you’re not wrecking the sound with excessive EQ or processing, you’re still in a good place.
Before I let you go, do you have any parting words of wisdom for people who are just entering the recording world?
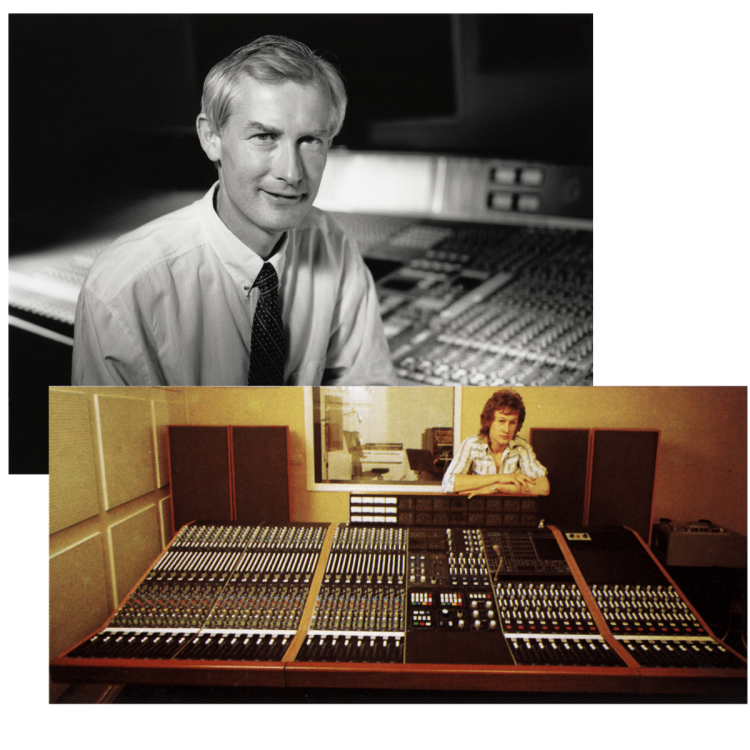
If you can swing it, and if you have the time, go out and buy the book The Recording Studio Handbook by John M Warham. I would recommend any edition. I have one from 1976, I believe.
The information in there, written and logged by an actual, not just a recording engineer, but an actual electrical engineer who is a recording engineer and borderline acoustician, the information he has in there is incredible. This book helped me tremendously and helped me get to a place intellectually that opened doors for even more opportunities.
Don’t think that old information doesn’t apply because we’re in a more of a digital age. It absolutely does.
That’s excellent advice. Ok, final question: Is there anything you have coming up that you can preview for us?
All I’ll say is I’m working on some very exciting stuff from multiple angles, for multiple artists and producers. I’ve been incredibly fortunate to be a part of some amazing projects, and I’m really grateful for the opportunities I’ve had. This is such an exciting time in my life and career, and it just keeps getting better.
As long as I stay focused, have the right tools, and make sure they’re working properly, everything should keep going incredibly well.
Featuring a totally redesigned user workflow and a whopping 12 new sample packs, the new Slate Sounds platform makes finding the perfect sound a breeze.
Slate Sounds makes it super easy to find exactly what you need. Search by genre, instrument type, key signature, or BPM, and audition loops and one-shots individually. When you find the right sound for your project, download it by itself or grab the whole pack — it’s your call.
With over 4,000 new sounds (more than 20 GB!) joining the party, Slate Sounds is packed with mouth-watering, one-of-a-kind samples that will take any track to the next level.
New packs include:
Chromira Alternative Electronic Sample Pack: Over 650 drum samples, melodic loops, and FX to satisfy producers seeking an emotional, modern edge.
Machina Modern Cinematic Sample Pack: Tap into more than 250 synth loops, drums, FX, and more to make your next production come to life.
Solara Techno Sample Pack: Throw it back to the underground with 300+ samples inspired by the raw energy of old school techno, warehouse waves, and classic breakbeats.
Particles Hyperpop Sample Pack: A massive collection of over 650 samples built for the next wave of hyperpop producers.
Sunset Country Pop & Acoustic Sample Pack: A fresh collection of 300+ samples perfect for today’s country-pop crossover hits.
Velvet Rhodes Sample Pack Vol. 1: Warm, soulful, and versatile, Velvet Rhodes delivers a curated collection of more than 50 gooey Rhodes loops.
Cloud Strings Guitar Sample Pack: Drift into a world of mellow moods and late-night melodies with this rich collection of 150 electric guitar loops.
Resonant Strings Sample Pack Vol. 1: Explore 150 incredible orchestral loops, perfect for intimate, cinematic and modern productions.
Echoes Cinematic Indie Pop Sample Pack: This pack delivers a collection of over 650 dreamy synth loops, heartfelt melodies, and punchy drums.
Pulse Indie Rock Sample Pack: Capture all the chaotic spirit of the indie sleaze era with 650+ samples, including gritty basslines, punchy drums, distorted guitars and more.
Quiet Tapes Lofi Hip Hop Sample Pack: Enjoy 150+ samples including nostalgic keys, washed out vocals, dusty drum loops, and more.
Voltage Rocktronic Sample Pack: This pack fuses distorted guitar riffs and punchy drums with thunderous basslines, aggressive FX, and explosive electronic kits.
Subscribers can access Slate Sounds now! Click here to try start exploring today.
When we first released the original ML-1 microphone and Virtual Microphone System (VMS), the recording world buzzed with excitement. Glowing reviews and countless YouTube demos proved it was a transformative step forward, bringing the coveted sound of classic microphones to anyone with a DAW.
Now, we’re raising the bar again with a new microphone and an entirely fresh way to use your mic models: meet the ML-1A microphone and the Virtual Microphone System plugin.
Let’s explore how the ML-1A distinguishes itself from the original ML-1, how it seamlessly integrates with our plugins and mic model lineup, and why it’s a must-have mic—even if you already own the first-generation model.
A Look Back at the Original ML-1 & Virtual Microphone System
When the ML-1 first hit the scene, it revolutionized recording by making iconic microphones accessible to the masses. It provided a neutral, “clean slate” signal that could be transformed into the sound of timeless vintage mics spanning multiple musical eras. It was a game-changer, letting creators achieve world-class vocal and instrument recordings without spending a fortune on famous gear.
But even groundbreaking ideas can be improved. The first-generation VMS required you to run your models in Virtual Mix Rack (VMR), which could be a heavy lift on some systems and wasn’t the most intuitive user experience. And while the ML-1 hardware was revolutionary, our engineers saw room to enhance its build quality, refine the low-frequency response, and add hardware controls for loud sources.
What’s the Difference?
The ML-1A builds on the strengths of its predecessor while introducing several important upgrades.
Flatter Frequency Response
We redesigned the ML-1A from the ground up to create a mic that offers an even more accurate “blank canvas” capture. That means:
Enhanced Low-End Accuracy: More true-to-life detail in the bass frequencies, ensuring deep voices, low stringed instruments, and powerful drums are captured with improved fidelity.
Transparent Midrange & Top-End: Fewer corrective moves are needed in the plugin—your takes will sound spot-on right out of the gate.
Pad Switch for Loud Sources
Got a vocalist who practically lives at 100 dB? Recording a drum kit in a tight space? The ML-1A now includes a three-position pad switch with -10dB or -20dB options, handling sound pressure levels up to 145 dB SPL. No more worries about headroom or distortion on loud takes.
Low Self-Noise & Outstanding Sensitivity
For the tech-savvy (and the curious), here are the ML-1A’s key specs:
Self-Noise: 8 dBA (remarkably quiet, ensuring minimal hiss or background noise)
Sensitivity: -32.5 dB (capturing nuances with exceptional detail)
Max SPL: 145 dB (with -20dB pad enabled)
Translated into everyday terms, the ML-1A captures everything—from the subtlest whisper to the loudest snare—without losing clarity or detail.
Robust, Stylish Design
Beyond specs, there’s the look and feel. The ML-1A comes in a durable, ballistic nylon soft case, replacing the old flight-case form factor. It’s easier to carry around, looks sleeker in your studio, and still provides reliable protection for your new go-to mic.
When you combine these benefits with the ML-1A’s improved performance, it’s clear why the jump from ML-1 to ML-1A isn’t just incremental—it’s transformative.
Taking Microphone Modeling to New Heights
Of course, the ML-1A’s hardware is only half the story. The brand-new, dedicated Virtual Microphone System plugin gives you an arsenal of new and improved features that make your projects easier, faster, and more creative.
Mic Model Morphing
Ever wondered what a silky-smooth, old-school tube mic blended with a modern bright condenser would sound like? Now you can morph them together. The new plugin lets you pick two different mic models and blend their characteristics—resulting in a custom hybrid you won’t find anywhere else.
Mono-to-Stereo Widening
Transform a standard mono vocal into a wide, immersive track that spreads across the stereo field. Perfect for background harmonies or creating an epic cinematic vibe for dialogue, this feature adds depth and interest without a complicated signal chain.
Proximity Slider & Low-Frequency Roll-Off
We all know the proximity effect can be your best friend—or your worst enemy. The VMS plugin’s ‘Proximity’ Slider simulates how close or far your vocalist is from the mic, controlling that extra bass buildup that happens in real life. Need some extra warmth? Push it up. Getting too boomy? Dial it back. There’s also a handy low-frequency roll-off to instantly remove rumble or unwanted low-end clutter.
Virtual Preamps
Pair your mic model with preamp emulations to recreate legendary front-end chains. Whether you crave the subtle saturation of a tube console or the punchy clarity of a modern solid-state design, it’s all there in one interface.
The Mic Locker That Grows with You
One of the most exciting aspects of VMS 2 is the way mic models integrate into your software subscription. If you’re an All Access Pass or Complete Access Bundle subscriber, you automatically get access to all 36 current mic models, including the brand new Radio France Signature mic expansion pack. Any new expansion packs we develop will become instantly available in your subscription upon release.
Traditional modeling microphones from other brands often come locked to the models they ship with. With us, your mic locker keeps on growing.
The Big Takeaway
From the flatter frequency response to the dedicated Virtual Microphone System plugin, the ML-1A is more than a simple hardware refresh. By addressing real user feedback—more robust hardware, standalone software, better handling of loud sources, and simpler subscription integration—we’ve crafted a system that rewrites the rules of what a modeling mic can do.
Three Months Free with the ML-1A
And here’s a perk you won’t want to miss: Your ML-1A purchase now comes with a three-month subscription to the Complete Access Bundle. All 36 mic models we make are included, so you can experiment with our entire suite of plugins and mic models right out of the box.
Ready to Take the Next Step?
The ML-1A is your invitation to explore a one-of-a-kind music-making experience. Dive into a whole new world of recording possibilities with a top-shelf collection of mics that any pro studio would be clamoring to call their own.
Already own an ML-1? You’ll love the improved workflow thanks to the dedicated Virtual Microphone System plugin. Starting fresh? There’s no better introduction to advanced microphone modeling than the ML-1A—especially with three months of the Complete Access Bundle included.
[Head over to our ML-1A page (link TBD) or check out our Studio Recording Microphones overview to learn more.]
Famous for its singular spirit and drive, the great state of New Jersey has long been a hotbed of musical innovation. From Bruce Springsteen to My Chemical Romance to Jack Antonoff to SZA, the Garden State has produced a rolling field of talent that has shaped the landscape of popular music more than once.
Today, that legacy lives on in the form of the DIY and independent music scenes. With the proliferation of easy-to-access music production software, today’s producers and engineers are largely self-made, recording their own bands and mixing/mastering their own work, initially out of necessity, but then eventually out of ease and a desire for an extra level of control over their output.
That’s where people like Adam Cichocki come in.
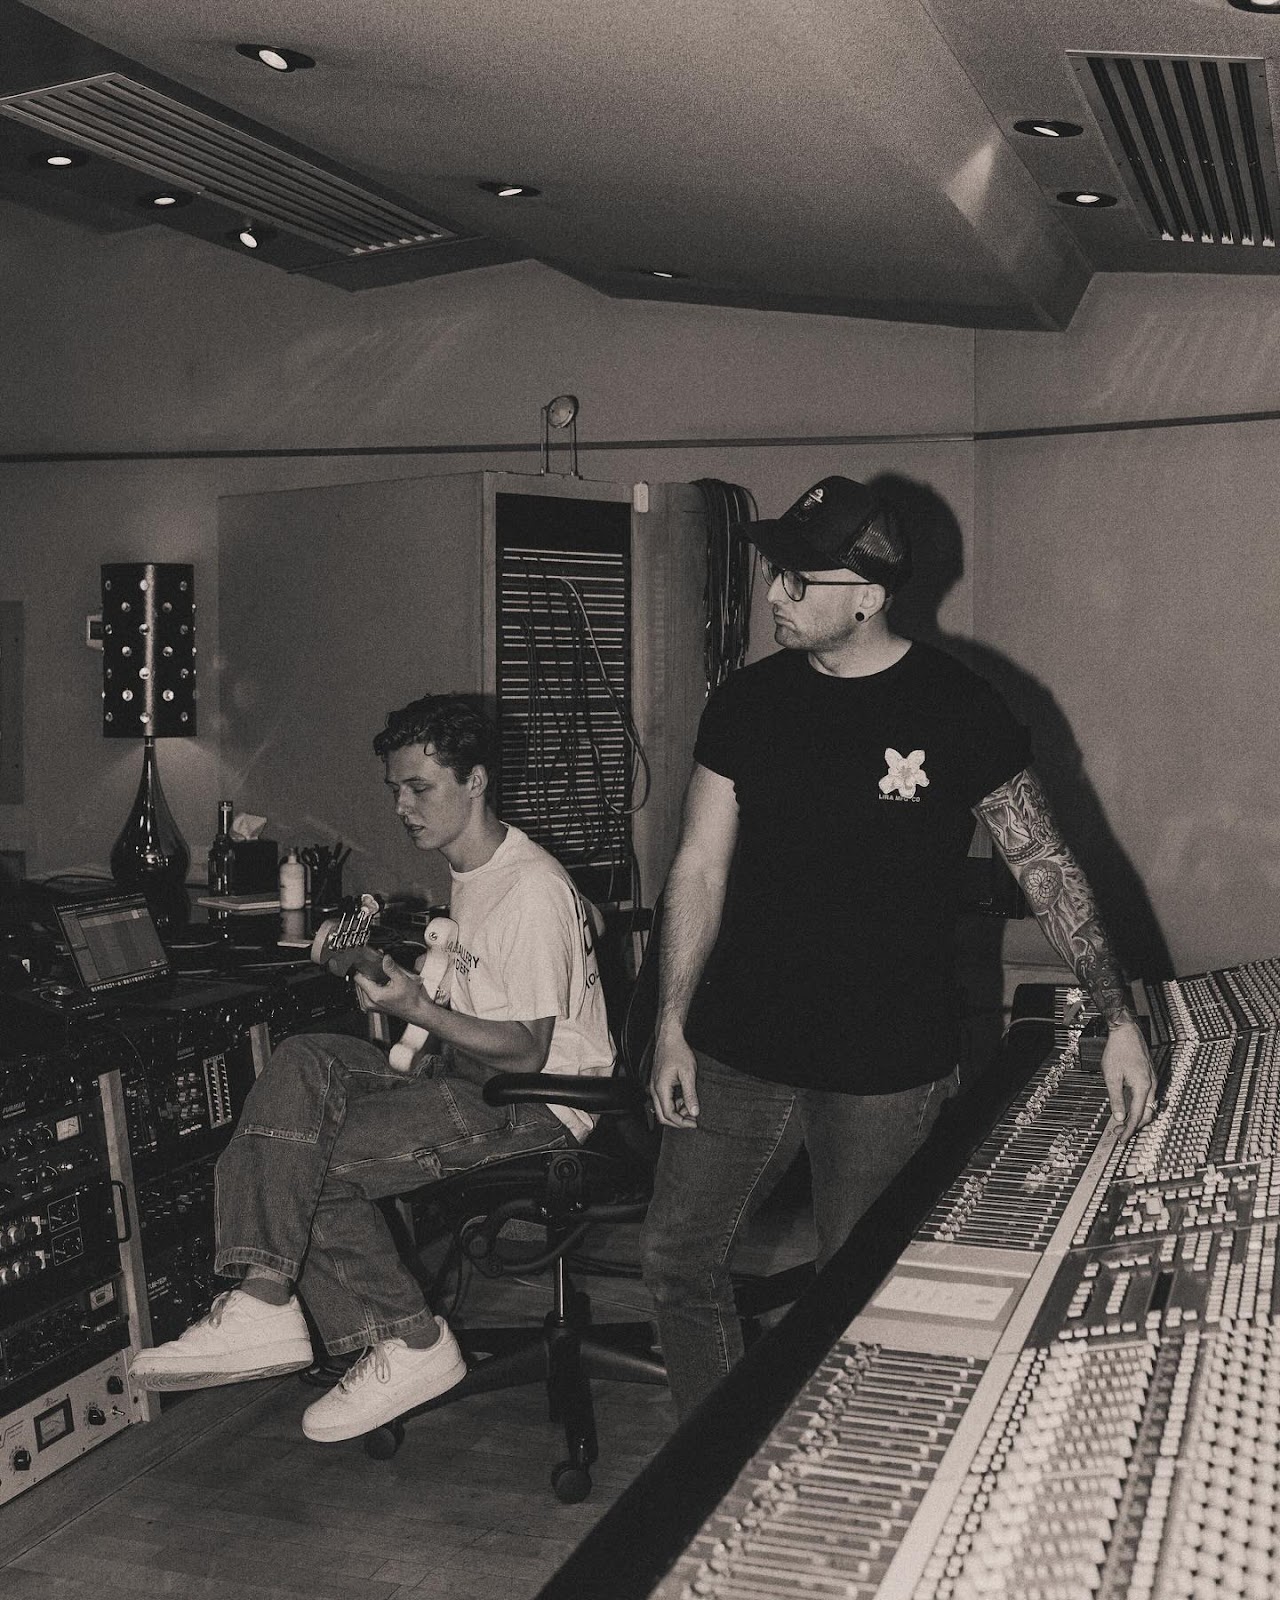
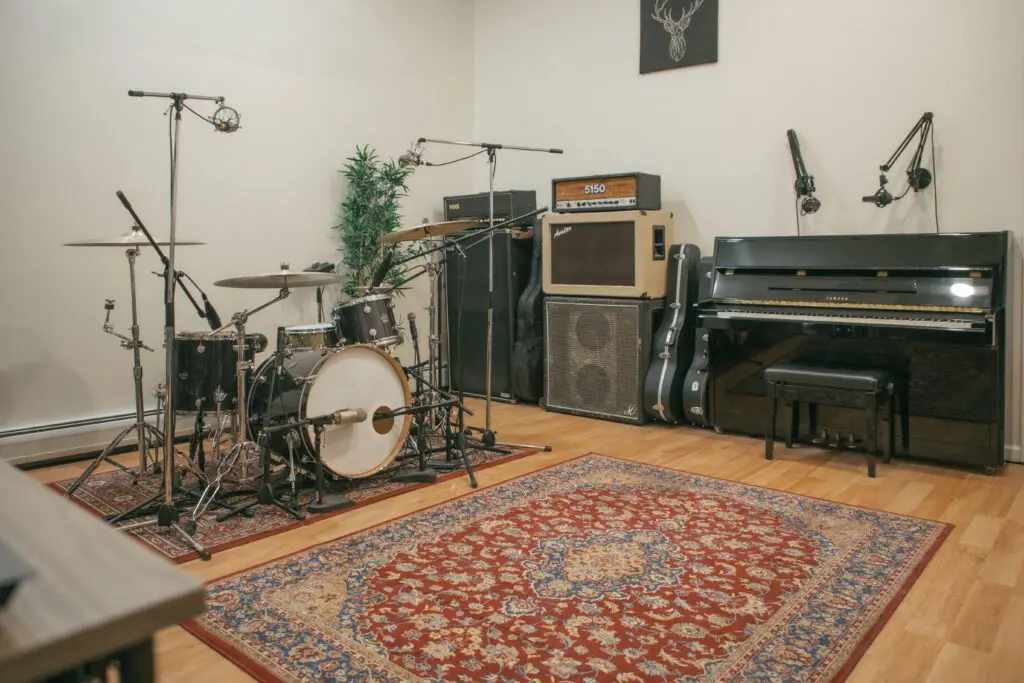
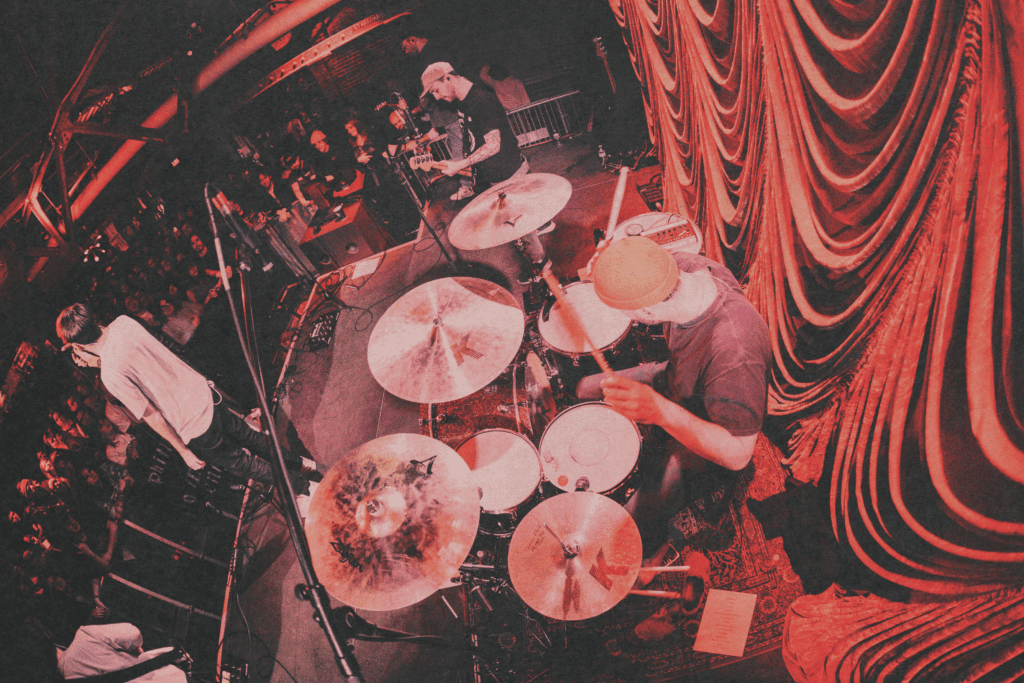
Cichocki is a long-standing member of the New Jersey music scene. He properly started his musical journey as the drummer of former Equal Vision Records band Gatherers. Now the owner of Bayonne, NJ’s Timber Studios, Cichocki has had a major hand in revitalizing the new grunge wave that’s been taking over the alternative music space.
Between opening a second Timber location and welcoming a baby girl into the world, Cichocki’s life has changed in many ways very quickly. Still, he found time to sit down and talk with us about the history of Timber, what it’s like to run a studio, his process when working with up-and-coming artists, and how to stay creative and curious.
Drew Van Buskirk: For those who may not know you, who is Adam Cichocki? Break it down for us.
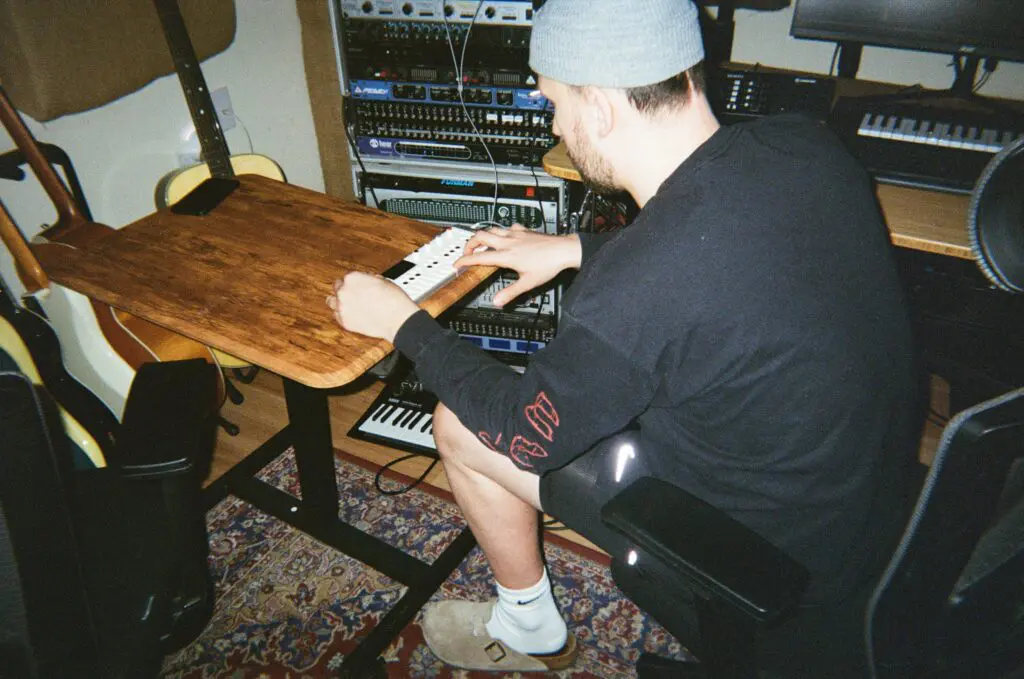
Adam Cichocki: I’m a record producer, mixer, mastering engineer, and multi-instrumentalist. I’ve been making records for 10+ years and have had the opportunity to work across a ton of genres to help shape my craft and my taste.
When I first started, it was more about figuring things out: recording bands primarily and passing off mixing and mastering to someone else who I admired. But as I progressed, I started learning those skills myself out of necessity and curiosity.
Being a musician made that easier since I was already writing and working on demos for my personal bands and I had a ton of musician friends in the area. We would play shows with and become close with super talented people so I got to work on a ton of projects back to back early on to cut my teeth and get the practice in.
DVB: You play multiple instruments, correct?
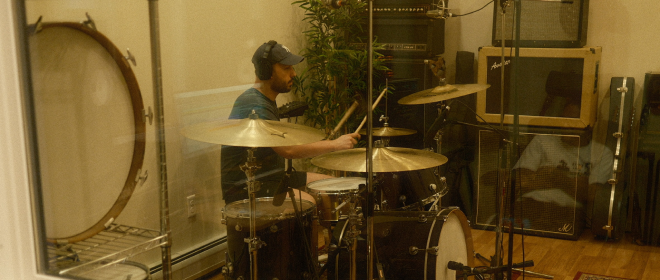
AC: Yeah! I started on guitar when I was about eight. Played violin for a few years, bass, and a bit of piano. Later on, when my band couldn’t find a drummer, I decided to learn drums myself. I locked myself in a room for months with a metronome and jamming to a bunch of songs I loved -it became an obsession. Now, I get to be involved in every aspect of record-making, from writing to engineering to producing. I love being more than just an engineer — I want to be a creative force alongside the bands I work with and be as much of a member that the band will allow me to be.
DVB: That’s great. Do you think that kind of all-in mentality is more common on the East Coast?
AC: I do. The East Coast has a work ethic that’s very much “figure it out and do whatever you need to to make it happen.” A lot of people here start out playing in bands, recording out of necessity, and then eventually take on all aspects of the making of a record. It’s definitely a gritty, do-it-yourself mentality. I feel like some of LA has a different vibe, more network-focused, more collaborative which is awesome. But on the East Coast, especially early on, a lot of people are just grinding away andbuilding their own thing I think.
DVB: Let’s talk about Timber Studios. How did that come to be?
AC: Timber Studios started in my parents’ basement around 2010. I didn’t even have a name for it at first, it was just “Come record at Adam’s house.” (laughs) I officially named it Timber Studios in 2013 when I went full-time. The name was inspired by these giant evergreen trees outside my parents’ house; kind of a play on the word “timbre” as well. I’ve since moved locations and now have two beautiful studios in Bayonne NJ; they’re built on a foundation that started so small and modest and now have had bands from all over the world come and make amazing records here.
DVB: Love that. So, was Gatherers the first band you recorded, or were there others before that?
AC: Gatherers was one of the first serious projects. That was around 2011, before Timber was official. I was still figuring out my engineering style while also learning how to be a proficient drummer since it was my first time drumming in a band. A lot of learning curves all at once haha.
DVB: Do you remember the first project you recorded that wasn’t your own band?
AC: Yeah, I think it was a band called Hodera, a really cool group from Jersey. I met Matt from that band at a show, and we started working together. That turned into recording multiple records, and one of their songs ended up blowing up on Spotify, charting alongside massive artists and going viral. It was surreal to see something I had my hands on move in that way.
DVB: That’s wild! Do you feel like moments like that helped establish you?
AC: Definitely. Seeing something you worked on reach a wider audience than you’re used to is validating. It also reinforces the importance of capturing something real—music that resonates with people.
DVB: Soul Blind is another up-and-coming band that you started working with early on. How did you get connected with them?
AC: I met Finn from Soul Blind probably back in 2016 or so, he was in a band called Daisychain at the time. We did some songs together and from there, I got involved with Soul Blind by mastering one of their early EP’s. Years later we reconnected when my good friend Jon Markson got hit up to do their EP and he brought me into the fold to co-produce and make the record with them. It was amazing to reconnect with Finn and get to know and collaborate with the rest of the band. It also became the first of many projects Jon and I have done together. I value him greatly as a collaborator and twin brainiac haha.
Soul Blind is really in their own lane and have such a fresh take on the genres they tap into. Their sound really clicked for me and we all worked really hard to make some amazing songs together.
DVB: It seems like grunge is having a moment again.
AC: Yeah, people are hungry for unfiltered and engaging music. I think there was a time where everything that was coming out was so rigid / doctored and perfect, that now hearing a band just absolutely rip in an authentic way that reflects the way they kill it live, people are connecting . Soul Blind captures that energy so well.
DVB: What’s your approach when working with a band like that?
AC: It’s about letting them be themselves but helping refine their vision in whatever ways that needs to happen. Every band has a sound they’re chasing in their heads, and my job is to help them get there in the most fulfilling way possible.. Collaboration is key — I don’t just want to be an engineer hitting ‘Record’. I want to be actively shaping the record with them as much as they’ll let me.
DVB: What do you think makes a great record?
AC: Capturing emotion. A record should feel alive. That comes from creating the right environment in the studio where the band feels comfortable pushing themselves. Technical skills are important, but at the end of the day, music is about feeling.
DVB: How do you stay inspired?
AC: Working with different artists across a lot of genres keeps me inspired. I also try to listen to a lot of different music and get out of my comfort zone, stay curious, and constantly learn new techniques. It’s important to keep growing.
DVB: Any advice for aspiring producers?
AC: Keep it dangerous and trust your gut. Be patient, keep learning, and surround yourself with people who challenge you and inspire you.
We’re happy to announce that we will now offer machine-based licenses and two license activations for our entire product line, including free products, perpetual licenses and subscriptions.
Currently, using our products requires either an iLok USB dongle or an active internet connection, both of which can be inconvenient. With this update, you’ll no longer be restricted from accessing our products.
Two license activations are now included with:
All Access Pass: Activate to your local machine, iLok Cloud, or an iLok 2/3 USB dongle.
SSL Complete (Complete Access Bundle): Activate to your local machine or an iLok 2/3 USB dongle.
Perpetual “Buy Now” plugins: Activate to your local machine or an iLok 2/3 USB dongle.
We’ve also updated our entire product line with bug fixes and optimizations that will lead to a smoother user experience.
Check out Chad’s video below for a full breakdown of the changes, or click here to read an overview from our support team.
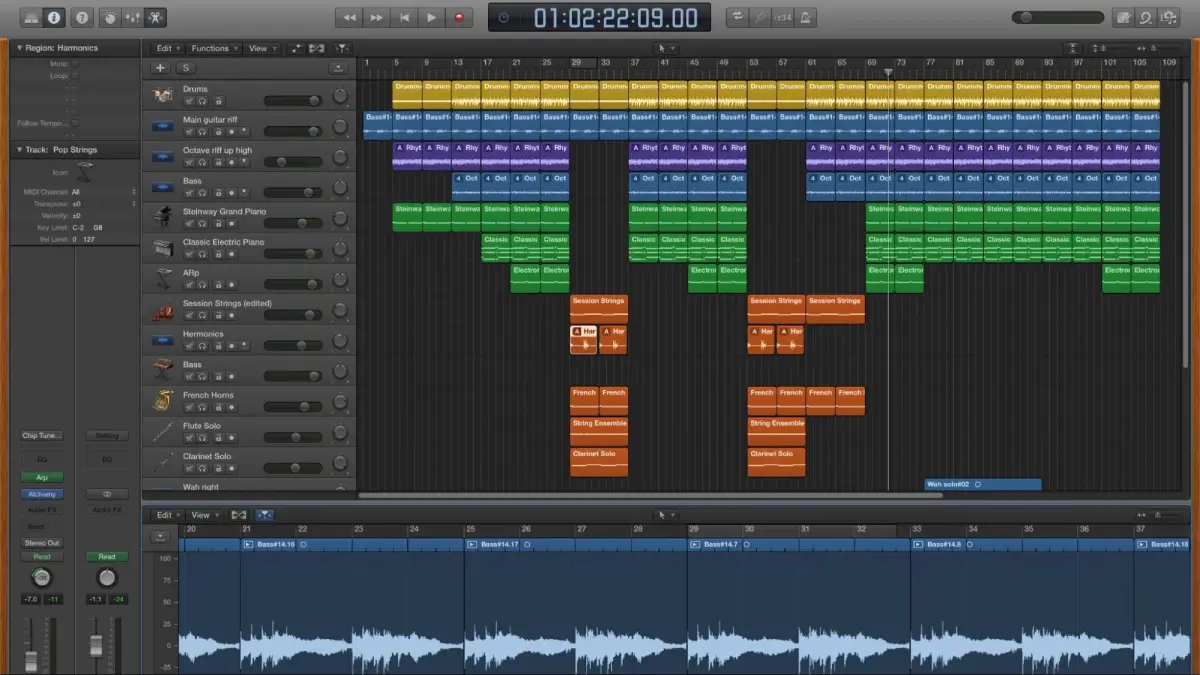
GarageBand is an ideal DAW for beginners, featuring a user-friendly interface, comprehensive virtual instruments, and educational lessons.
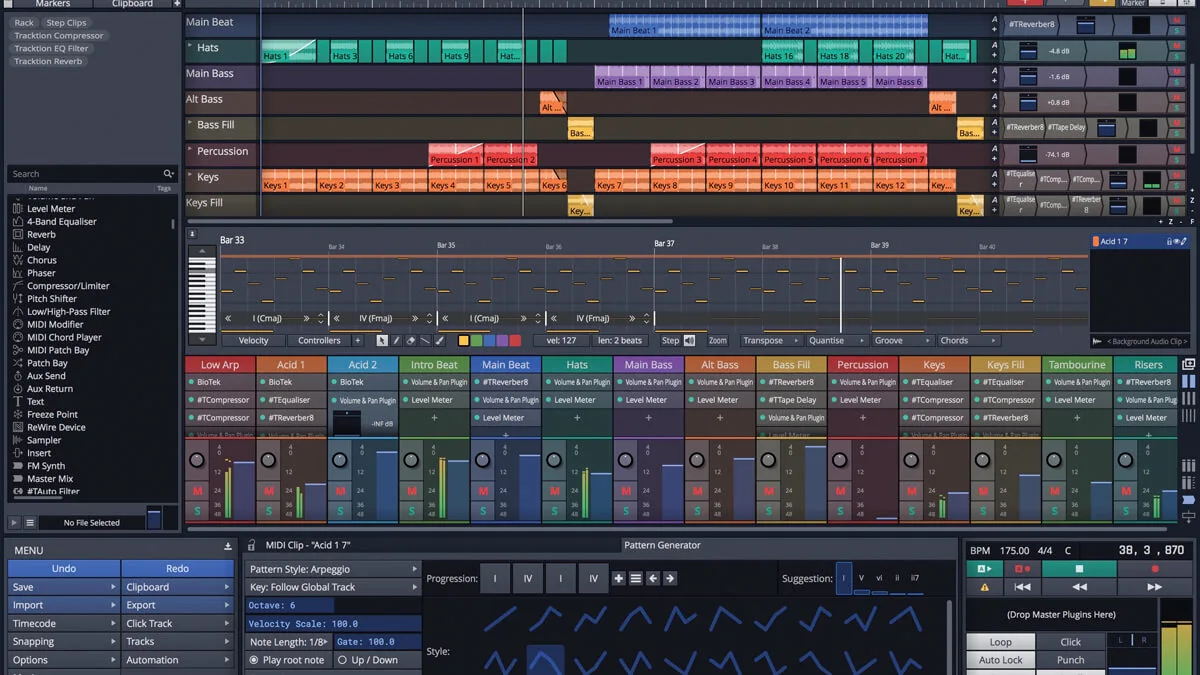
Tracktion Waveform Free is a versatile cross-platform DAW with no restrictions on track counts or plugin usage, making it perfect for any level of music producer.
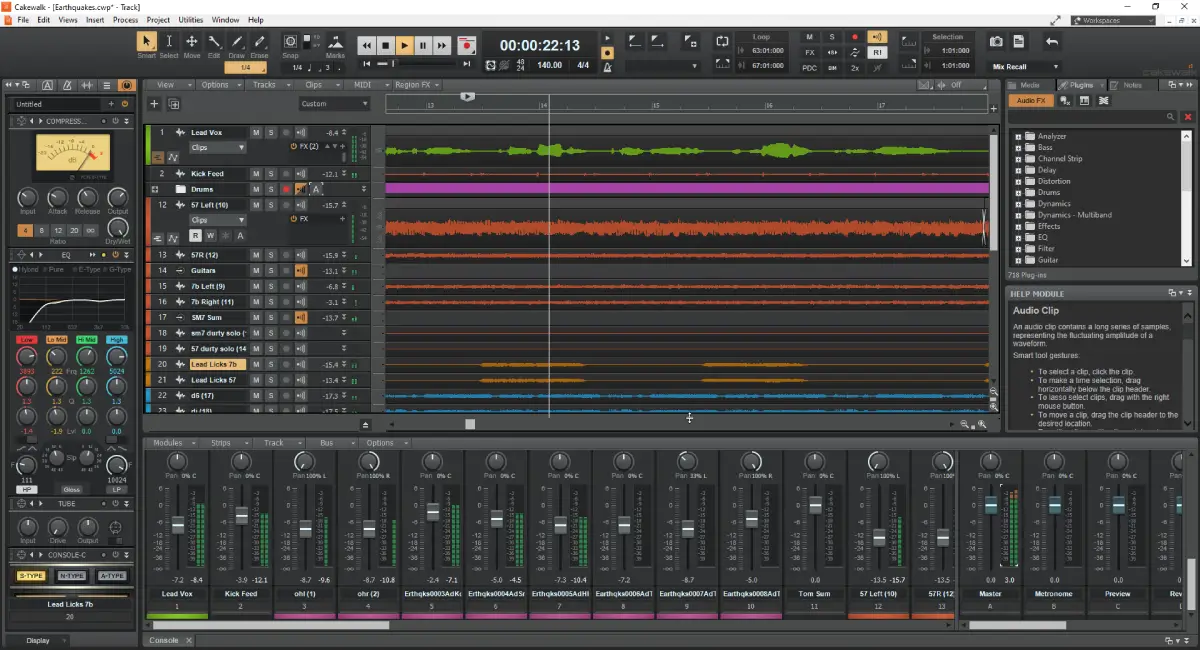
Cakewalk by BandLab offers a robust set of features rivaling paid DAWs, including unlimited tracks and a 64-bit mix engine, but it’s only available for Windows.
Searching for the best free DAW for music production? We have compiled a list of the top 10 free digital audio workstations available in 2025. Whether you’re just starting your music production journey or you’re just browsing for new tools, these options are feature-rich and cost nothing.
Apple GarageBand
Apple GarageBand, known for its simplicity and powerful set of stock tools, ranks among the best free digital audio workstations, exclusive to macOS and iOS devices. Created with newbies in mind, GarageBand provides a user-friendly interface simplifying complex aspects of music production. GarageBand could mark your perfect entry into the world of DAWs if you’re a novice.
GarageBand’s comprehensive library of virtual instruments is one of its distinguishing features. Whether you’re looking to create beats with electronic drums, layer synth pads, or add orchestral elements to your track, GarageBand has you covered. The inclusion of rhythmic and instrumental loops further enhances your creative possibilities, allowing you to build complex arrangements with ease.
GarageBand also offers an impressive array of royalty-free sounds from top producers like Boys Noize and Mark Ronson, ensuring that your tracks can have a professional edge right from the start. Additionally, the DAW supports third-party AU plugins, giving you even more flexibility to expand your sonic palette.
For those interested in learning and improving their musical skills, GarageBand provides 40 free guitar and piano lessons, as well as 20 artist lessons from famous musicians. This educational aspect makes GarageBand not just a tool for creation but also a platform for growth. Whether you’re recording vocals, guitars, or any other instrument, GarageBand allows you to mix up to 255 tracks, giving you plenty of room to experiment and refine your sound.
GarageBand also comes with Smart Controls, enhancing sound shaping by adjusting parameters with knobs, buttons, and sliders according to the chosen instrument. Plus, with the Logic Remote app, you can control and play GarageBand instruments on your Mac wirelessly using your iOS device. This seamless integration between macOS and iOS devices makes GarageBand a truly modern audio workstation.
Tracktion Waveform Free
Tracktion Waveform Free distinguishes itself in the competitive landscape of free digital audio workstations with its versatility and absence of restrictions. Unlike many free DAWs that impose restrictions on track counts or plugin usage, Waveform Free offers a completely unlimited free DAW experience. This makes it a fantastic choice for producers who need a fully functional free DAW without the usual constraints.
Cross-platform compatibility is one of the most appealing features of Waveform Free. Whether you’re using:
PC
Mac
Linux
Raspberry Pi
Waveform Free has you covered. This flexibility ensures that you can continue your projects seamlessly across different devices and operating systems.
Waveform Free comes loaded with the following features:
14 built-in audio effects
8 MIDI effects
11 utility plugins
4 built-in instruments
This robust set of tools provides everything you need to start producing high-quality music right out of the box. Moreover, Waveform Free supports extensive integration with third-party plugins, including VST, VST3, and AU formats, allowing you to expand your creative possibilities.
Beyond its impressive features, Waveform Free incorporates various new editing enhancements. Features like:
Range Selection
Ripple Delete
Step Clip Editor
Actions Panel
streamline your workflow, making it easier to navigate and manipulate your audio and MIDI tracks. There’s also a MIDI typing feature that allows you to input MIDI notes directly from your computer keyboard, adding another layer of convenience.
Waveform Free supports expansion packs, catering to those seeking to broaden their DAW capabilities. These packs allow you to add specific features as your needs evolve, ensuring that your DAW grows with you. All these attributes make Tracktion Waveform Free a great free DAW that caters to both beginners and professional electronic music producers.
Cakewalk by BandLab
Cakewalk by BandLab, renowned for its robust features and capabilities, holds a powerful position among free digital audio workstations. Based on the renowned SONAR Platinum, Cakewalk offers a rich feature set that rivals many paid DAWs. This Windows-only DAW provides everything you need for serious music production, from audio recording and editing to mixing and automation.
Cakewalk’s remarkable features include:
Support for unlimited audio, MIDI, instrument, loop, and auxiliary tracks
The ability to create complex projects without worrying about hitting any track limits
A fully customizable Skylight Interface, enabling you to tailor your workspace to your workflow needs.
For those seeking high-quality audio, Cakewalk by BandLab delivers with its advanced 64-bit mix engine. This ensures that your mixes are clean, dynamic, and accurate. Additionally, the DAW includes a unique VocalSync® tool for automating timing between vocal tracks, making it easier to create perfectly aligned overdubs.
While Cakewalk by BandLab was once dependent on the BandLab Assistant application for installation, it can now be installed directly without any additional software. This streamlines the setup process, allowing you to dive straight into your music projects. The DAW’s compatibility with touch devices also adds an analog feel to your digital workflow, enhancing your overall production experience.
Studio One Prime by PreSonus
Another commendable choice among free digital audio workstations is Studio One Prime by PreSonus. Known for its user-friendly interface, Studio One Prime is particularly suitable for singers, songwriters, and anyone looking to handle standard audio recording and mixing tasks. Its intuitive design ensures that you can focus on your creativity without getting bogged down by technical complexities.
Supporting unlimited audio tracks and mixer channels is a significant strength of Studio One Prime. This means you can build intricate arrangements and mix multiple audio and MIDI tracks without any restrictions. The DAW also includes native audio effects that enhance your sound, making it a capable tool for music production.
Although Studio One Prime is a free DAW, it offers the option to purchase additional effects through in-app purchases. This allows you to expand your arsenal of tools as your production needs grow. However, it’s important to note that Studio One Prime lacks third-party VST plugin support, which might be a limitation for some users.
Studio One Prime, despite its limitations, persists as a powerful free DAW, attributed to its new audio engine and superior audio effects. Its workflow is designed to facilitate a rapid and efficient production process, making it a great choice for those who want to produce music quickly and effectively.
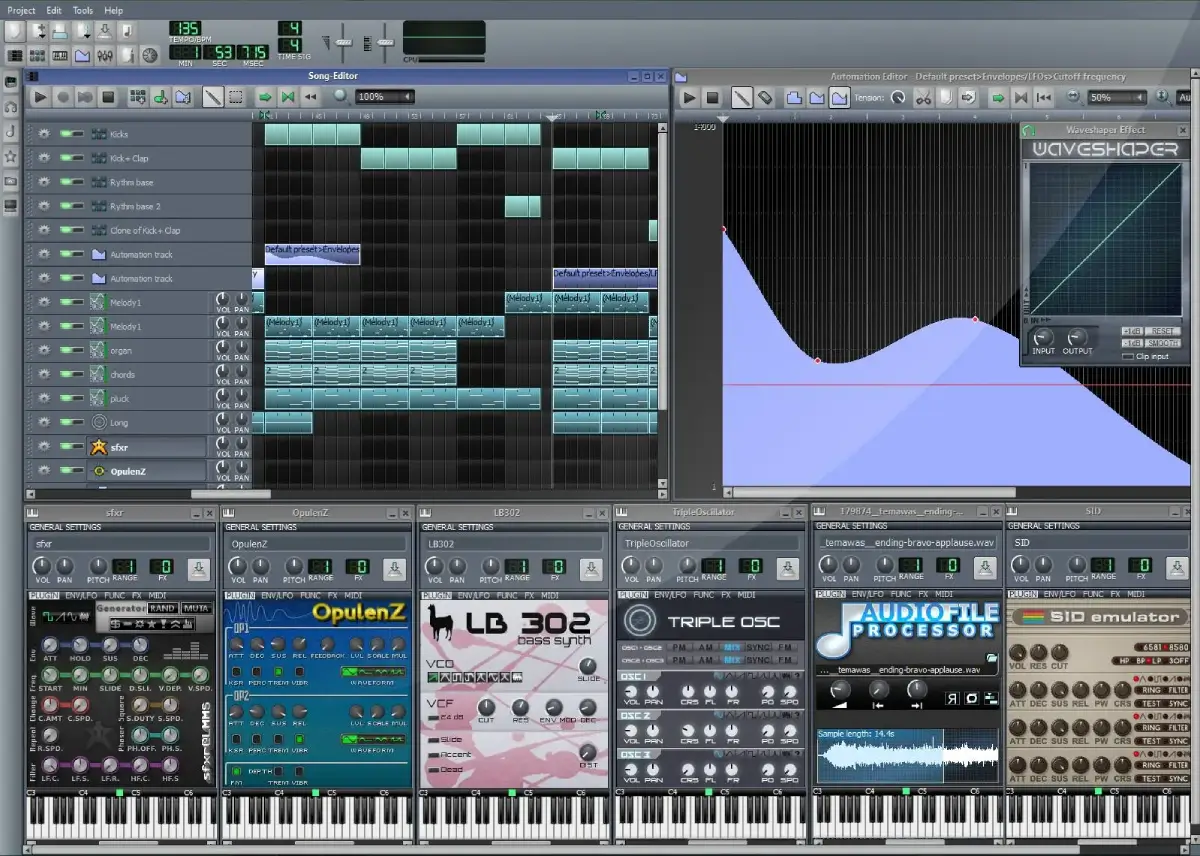
LMMS (Linux Multimedia Studio)
LMMS (Linux Multimedia Studio) is a cross-platform, open-source DAW that has quietly become a go-to solution for electronic music producers.
Here are some key features of LMMS:
Available for Windows, Mac, and Linux
Offers a pattern-based workflow
Ideal for genres like rap, trap, and electronic music
Versatile and accessible
LMMS’s distinguished feature is its comprehensive library of integrated instruments, presets, and effects. The ZynAddSubFX synthesizer, in particular, is a powerful tool for creating a wide range of sounds. This makes LMMS a great free DAW for those who enjoy virtual modular software and want to experiment with different sonic textures.
LMMS also supports Windows VST2 plugins, although many are either not fully or only partially supported. This means that while you have access to a variety of plugins, some may not function as expected. The active forum community, however, is always ready to help with any questions or issues you might encounter.
LMMS’s major drawback is the absence of audio recording capabilities. This means that users need to generate sounds using virtual instruments or import their own samples. Additionally, LMMS requires a learning curve and some skills to use effectively for more demanding projects. LMMS, despite these hurdles, continues to be a potent tool for electronic music production.
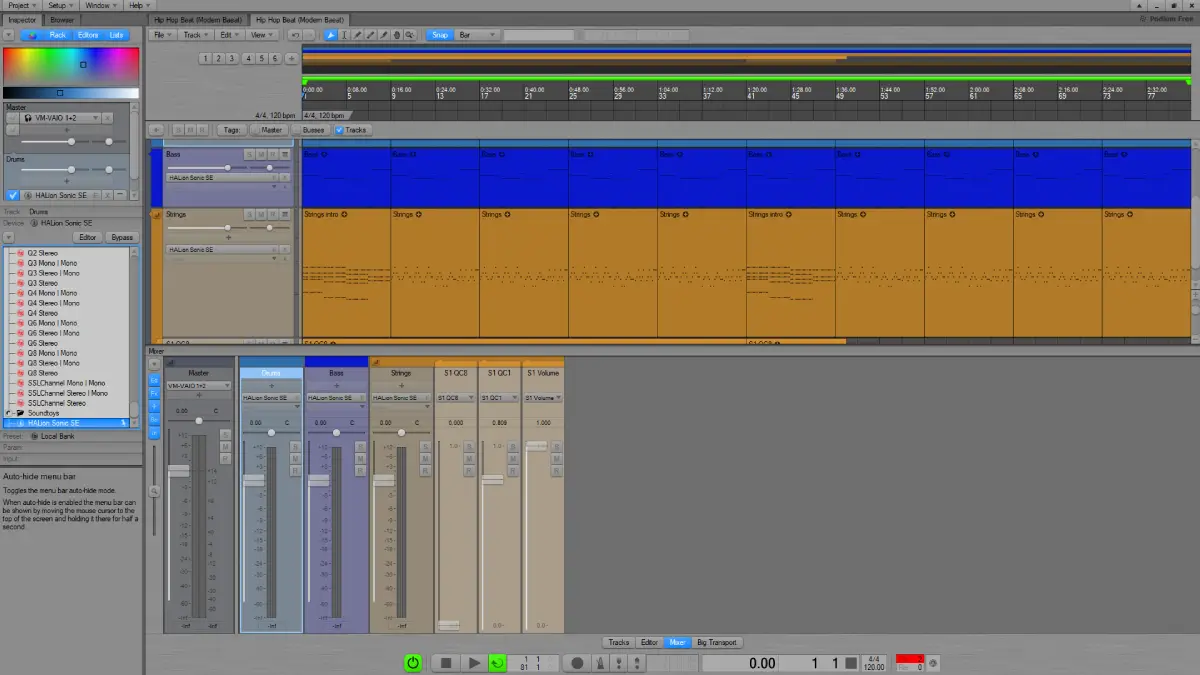
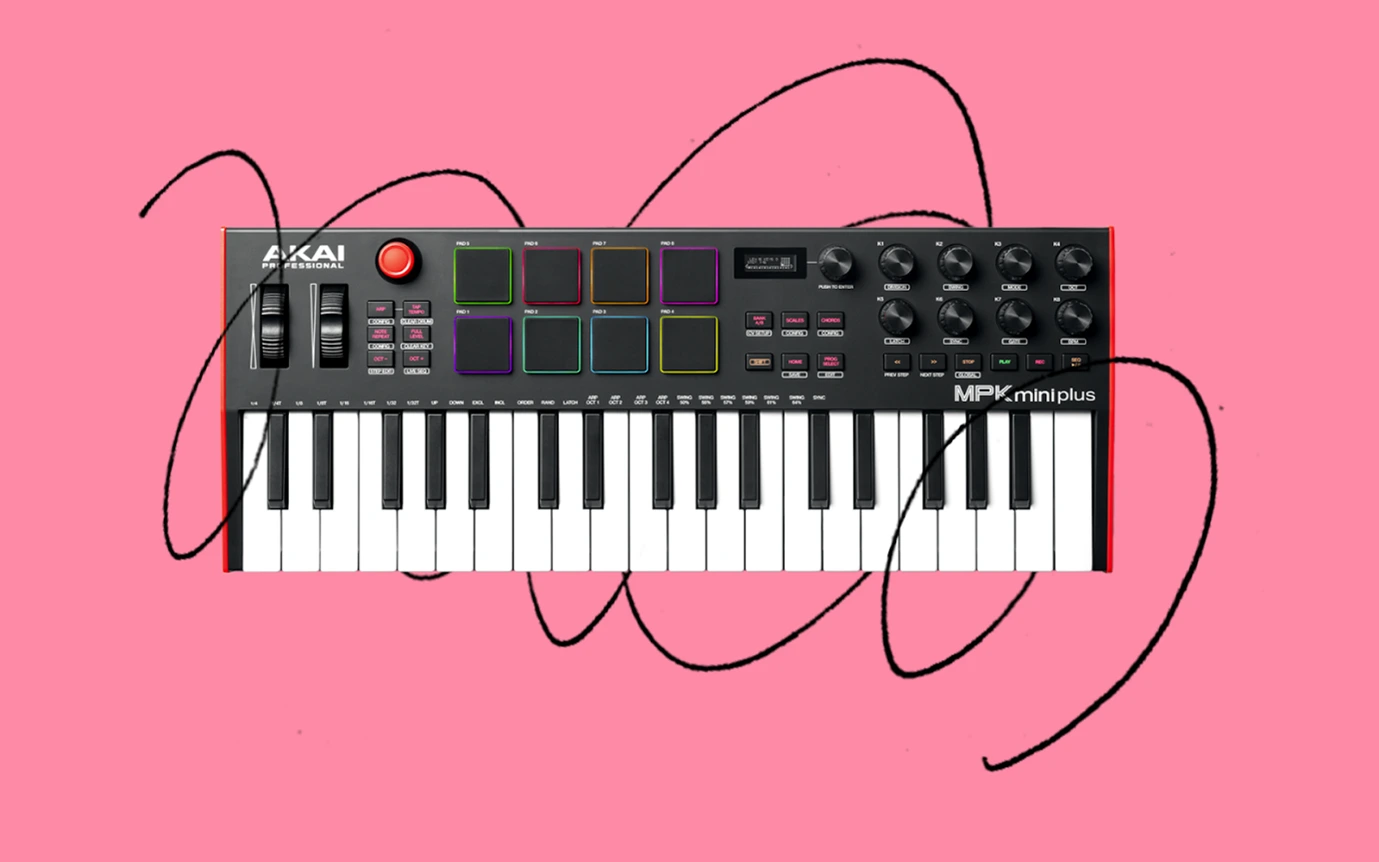
Akai MPC Beats
Designed for beat makers and hip-hop producers, Akai MPC Beats is a dedicated DAW.
Features include:
Virtual MPC interface that replicates the classic MPC hardware
Familiar and intuitive workflow for creating beats
Excellent choice for those focused on electronic music production
MPC Beats offers a range of features that enhance its beat-making capabilities, including VST plugin integration, 80 audio effects, and a time-stretching tool. These features allow you to manipulate your sounds and create intricate beats with ease. The DAW also supports third-party plugins and sample packs, giving you access to a wide array of sounds and effects.
Compatibility with MIDI controllers, including external midi controller support, is another highlight of MPC Beats, making it easy to control your virtual instruments and create dynamic performances. However, one limitation to be aware of is that MPC Beats is restricted to eight instrument channels. While this might be sufficient for some projects, it could be a constraint for more complex arrangements.
Despite this restriction, Akai MPC Beats continues to be an influential tool for beat makers and hip-hop producers. Its combination of a virtual MPC interface, extensive audio effects, and MIDI controller compatibility makes it a standout choice for anyone looking to create beats.
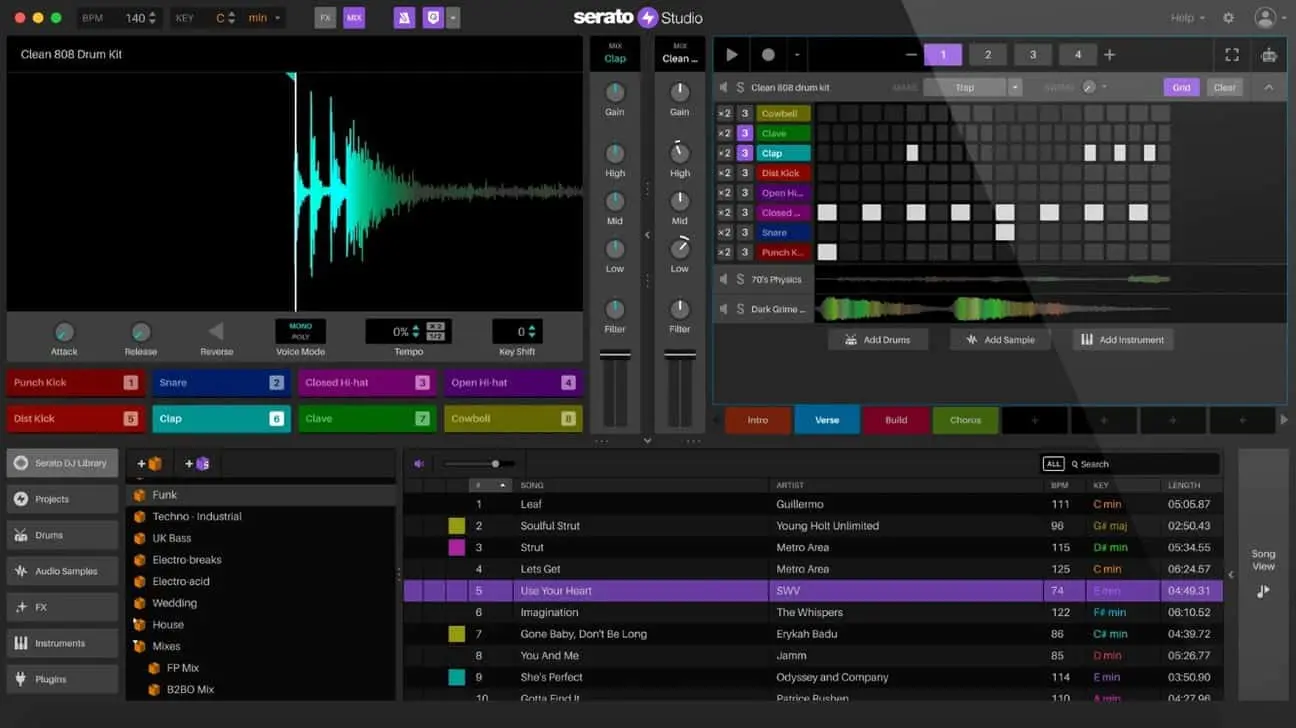
Serato Studio
Serato Studio, a free DAW designed for beatmakers, has an intuitive workflow simplifying the manipulation of samples and loops. Its design simplifies the process of creating beats, allowing you to focus on your creativity rather than getting bogged down by technical details. This makes it an attractive option for electronic music producers.
The free edition of Serato Studio does come with some limitations. You can use up to four Decks and four Scenes per project, and you’re limited to one Audio Track with MP3-only export. Automation is also disabled in the free version. While these restrictions might be a drawback for some, they still allow for a significant amount of creative freedom.
Serato Studio’s compatibility with both macOS and Windows ensures that you can use it on your preferred operating system. However, users accustomed to traditional DAWs might need some time to adjust to Serato Studio’s unique workflow.
Despite its constraints, Serato Studio provides a rewarding free DAW experience for beatmakers. Its intuitive design and powerful tools for manipulating samples and loops make it a valuable addition to any producer’s toolkit.
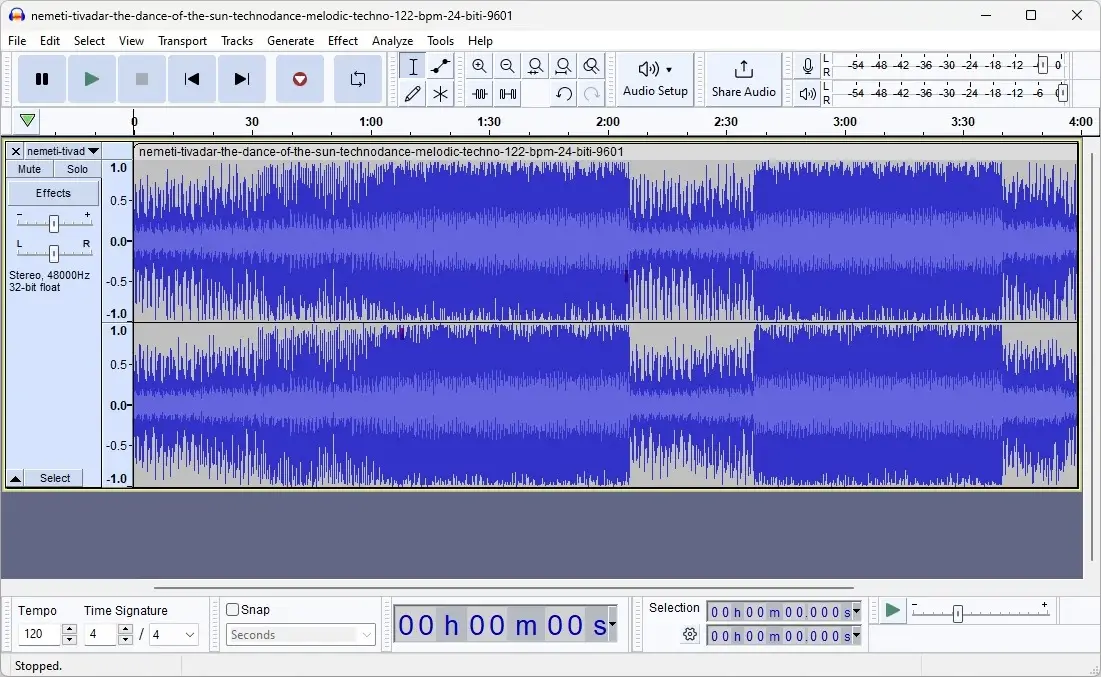
Audacity
In the world of free digital audio workstations, Audacity is a renowned name. Available for Windows, macOS, and Linux, Audacity provides a straightforward interface that is perfect for basic audio editing and recording tasks. While it may not have all the bells and whistles of more advanced DAWs, its simplicity and ease of use make it an excellent choice for beginners to audio recording and anyone in need of a reliable audio editing tool.
Basic audio recording capabilities form one of the fundamental strengths of Audacity. You can easily record audio from various sources, making it a handy tool for podcasters, voiceover artists, and anyone needing to capture sound. Its basic editing features, such as cut, copy, paste, and delete, are intuitive and easy to use, allowing you to make quick edits to your audio files.
Audacity is often used in conjunction with other DAWs, such as LMMS, for tasks like sampling, cutting, and recording audio. This makes it a valuable addition to any music production workflow, especially if you need to perform simple edits before importing your audio into a more feature-rich DAW.
However, Audacity does have its limitations. It lacks advanced features found in premium DAWs, such as multi-channel mixers and extensive virtual instrument support. Additionally, its interface might appear outdated compared to more modern DAWs, which could be a drawback for some users.
Despite its constraints, Audacity continues to be a potent tool for fundamental audio editing and recording tasks. Its straightforward interface and essential features make it an indispensable tool for many audio projects.
Podium Free
Podium Free represents another robust candidate in the world of free digital audio workstations. Known for its highly customizable interface, Podium Free allows users to tailor the look and feel of the DAW to their preferences, enhancing their workflow. This level of customization is rare in free DAWs and makes Podium Free a standout choice for those who value a personalized workspace.
Podium Free supports VST2 plugins, providing access to a wide range of third-party effects and instruments. This flexibility allows you to expand your sonic palette and explore new creative possibilities. The DAW’s intuitive user interface is designed to facilitate a rapid workflow, making it easy to navigate and manage your projects.
One unique feature of Podium Free is the ability to stretch MIDI clips to change their speed without affecting the pitch. This can be particularly useful for electronic music producers looking to experiment with different tempos and rhythms. The DAW also offers a virtual mixer and an object-based project structure, which enhances its flexibility and organization.
However, take note of some limitations associated with Podium Free. It only supports single-core processing for VST plugins, which means you need to monitor your CPU performance when using multiple plugins. Additionally, it lacks multi-threading and ReWire support, which could be a drawback for some users.
Despite its setbacks, Podium Free continues to be a versatile and dynamic instrument for music production. Its customizable interface, VST support, and unique features make it a great choice for producers looking for a free DAW with a high degree of flexibility.
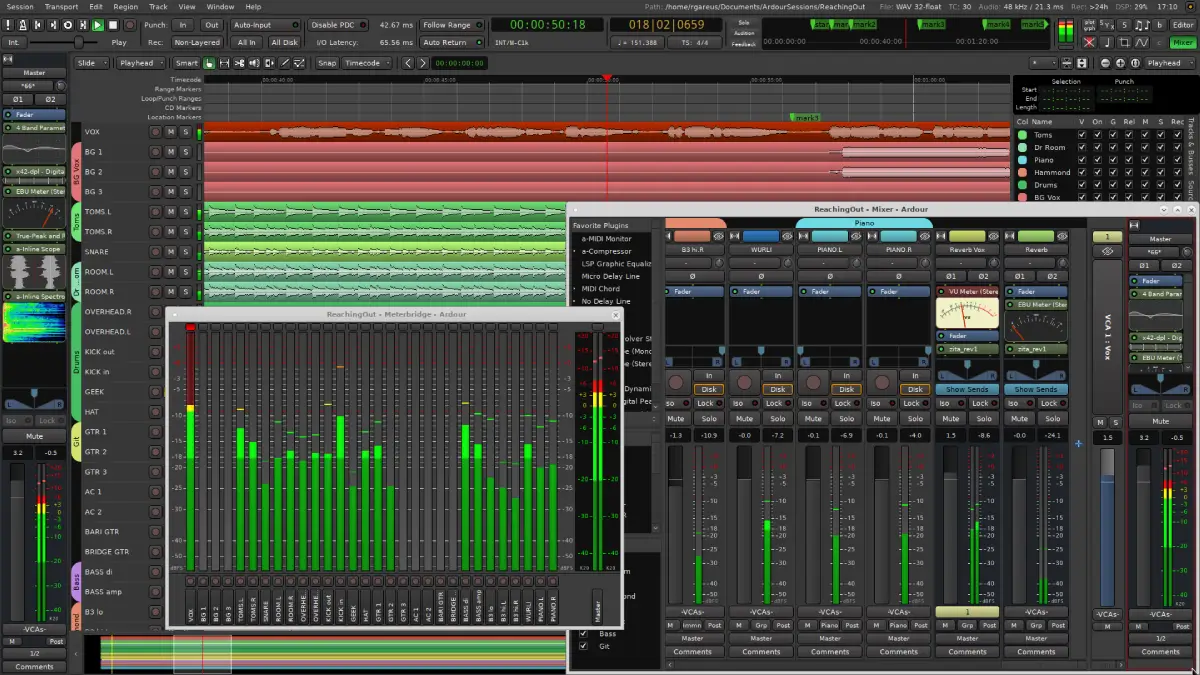
Ardour
Ardour, a feature-rich, open-source DAW, provides a robust toolkit for music production. Here are some key features of Ardour:
Compatible with Linux, macOS, and Windows
Supports all major plugin formats
Highly versatile option for producers
Open-source nature allows users to modify and distribute the source code
This makes Ardour a great choice for those who want a customizable and powerful music production software.
One of Ardour’s key strengths is its support for a wide range of audio and MIDI tracks, allowing you to:
Create complex projects with multiple layers of sound
Use comprehensive audio editing capabilities for recording and mixing
Have all the tools you need to produce high-quality music
Ardour also provides the freedom to compile the software from its source code if you do not wish to pay for a prebuilt version. While this can be challenging and time-consuming, it offers a level of customization and control that is unmatched by many other DAWs. For users who prefer a more straightforward setup, prebuilt versions are available for a subscription fee.
Despite its numerous strengths, Ardour does face a few challenges. Building Ardour from source on Windows and macOS can be difficult, requiring a certain level of technical expertise. However, for those willing to invest the time and effort, the rewards can be substantial.
In conclusion, offering a high degree of customization and control, Ardour is a powerful and flexible DAW. Its support for all major plugin formats and comprehensive audio editing capabilities make it a top choice for serious music producers looking for a free digital audio workstation.
Summary
In conclusion, the world of free digital audio workstations is rich with options that cater to a wide range of music production needs. From the intuitive and beginner-friendly Apple GarageBand to the feature-rich and customizable Ardour, there is a free DAW for every type of producer. Each DAW we’ve explored offers unique strengths and some limitations, but all provide powerful tools for creating high-quality music without the need for expensive software.
Whether you’re just starting out in music production or looking for a versatile tool to add to your existing setup, these free DAWs offer incredible value. They allow you to experiment, learn, and create without the financial burden of premium software. The democratization of music production tools means that anyone with a passion for music can start making tracks right away.
So, dive in and explore these fantastic free DAWs. Find the one that best fits your workflow and creative needs, and start producing the music you’ve always dreamed of. The possibilities are endless, and the only limit is your imagination.
Take Your Music Production to the Next Level
Exploring free DAWs is a great start, but to truly unlock your potential, consider joining Slate Digital’s Academy. Our courses are designed to help you master every aspect of music production, from the basics to advanced techniques. Learn from industry pros, access premium tools, and take your sound to new heights. Visit our Academy today and choose the plan that suits your creative goals.
Absolutely! Free DAWs like Cakewalk by BandLab and Ardour are equipped with professional-grade features and robust tools that can rival paid software, making them suitable for professional music production.
Yes, most free DAWs support third-party plugins, but it’s important to check the specific DAW’s compatibility before using them. Studio One Prime is an exception as it lacks support for third-party VST plugins.
Yes, many free DAWs are cross-platform, so you can use them on different operating systems like Windows, macOS, and Linux. Cakewalk by BandLab, however, is available only for Windows.
Free DAWs may have limitations like restricted track counts, lack of advanced features, or limited plugin support, which can impact your flexibility and creativity when producing music.
MIDI is a protocol that allows electronic musical instruments and computers to communicate, making it a vital tool for modern music production due to its flexibility, compact file size, and ability to manipulate musical elements with ease.
Understanding the basic components of a MIDI setup, such as MIDI ports, cables, and interfaces, is crucial for efficient device communication, with each component playing a distinct role in transmitting and converting MIDI data.
Advanced MIDI techniques, including MIDI Polyphonic Expression (MPE) and sequencing/automation, offer musicians greater expressive control and the ability to create complex compositions, enhancing the capabilities of electronic instruments to rival those of acoustic ones.
Musical Instrument Digital Interface, or as it’s more commonly known ‘MIDI’, is a technical standard that enables communication between computers and electronic instruments. Rather than transmitting sound itself, MIDI data details how music should be played. Due to the compact size of MIDI files and their versatility in editing, they have become indispensable in contemporary music production. This discussion will delve into the nature of MIDI, its operational mechanism, and the advantages it provides within the realm of composing music.
What Is MIDI: The Best Tool for Modern Music Production
MIDI serves as a standard protocol that fosters interoperability among electronic musical instruments, computers, and additional equipment. This system enables music professionals to integrate their work across various platforms effectively. In contrast to conventional audio files, MIDI data doesn’t contain actual sound recordings. Instead, it relays information about the notes to play, specifying details like pitch and note duration, without any auditory content itself. Because MIDI files are purely informational, they are exceptionally lightweight and highly amenable to manipulation and processing. Their flexibility means that a user can correct errant notes within these files just as effortlessly as they can modify an entire musical composition or—a testament to the integral role that MIDI occupies in contemporary music production.
Introduction
The notion of MIDI can seem daunting, replete with complex terms and elaborate configurations to many. Yet, this blog is set on unraveling the complexity of MIDI by segmenting it into straightforward, comprehensible components. We will begin at ground level by defining what MIDI represents and its operational principles. Subsequently, we’ll delve deeper into topics such as the application of midi controllers in music production. When you reach the end of this blog series, you’ll recognize that MIDI transcends being merely an instrument. It’s a portal to infinite musical opportunities.
The advantages offered by MIDI are numerous:
Diminutive file sizes
Remarkable adaptability
The capability of changing tempo, key signatures or instrument sounds while preserving sonic quality
Compatibility with an extensive selection of electronic instruments alongside digitally sampled tones
Unlimited potential for innovation in creation
Through utilizing MIDI’s capabilities, you gain more than just the ability to perform music—you’re empowered with precision tools essential for sculpting your unique auditory artistry down to its every subtle detail.
Understanding MIDI: The Basics
Unlike traditional audio files that capture sound recordings directly, MIDI files store detailed instructions for generating sounds, which results in much smaller file sizes and simplifies management tasks considerably. The use of this interface permits meticulous manipulation of key musical aspects such as pitch intensity or volume while also ensuring accurate timing during both live presentations and recording sessions.
Advantages of using MIDI include:
Reduced file size for easy handling
Simplified editing and alterations to music pieces
Swift modifications to parameters including rhythm speed or musical scale without the need to re-record full tracks again
Increased flexibility within the realm life performances tailored towards achieving specific sonic outcomes
Lastly it possesses compatibility with an arrayriad series thats available from many manufacturers with digital products instruments software thus unlocking new avenues creativity exploration.
How Does MIDI Work?
A MIDI keyboard does not record music, but rather generates a set of instructions, which is known as MIDI data. Whenever you play a note on the keyboard, it creates what’s called a “MIDI event,” signaling to any connected equipment precisely which note to hit, its duration, and intensity. These cues are sent in the form of MIDI messages that are composed of an initial status byte plus one or two additional bytes detailing the specific commands—enabling fine-tuning over your musical creation.
The transmission of these MIDI messages can occur via traditional midi cables or through USB connections and can be captured by a sequencer or digital audio workstation (DAW) for refinement and subsequent playback. One of the hallmarks of Midi technology is its ability to process several channels at once. Within one stream, there’s capacity for managing upiafdsdsadsto 16 distinct channels simultaneously—allowing each channel control over separate sounds or instruments—which is crucial for intricate setups during music production.
Understanding how these various midi channels function together ensures fluid interaction between devices involved in generating soundtracks. Specific assignments per channel guide different instruments for harmonious orchestration when using multiple pieces ofsadsadsa equipment alongside each other. MIDddi offers specialized System Exclusive (SysEx) messaging options facilitating comprehensive data transfer about instrumental functionalities—to give artists overarching control over their compositional elements.
The History and Evolution of MIDI
In the early 1980s, the story of MIDI began with a collaborative effort among major electronic instrument manufacturers that included names like Roland, Sequential Circuits, Yamaha, Korg and Kawai. Their joint efforts were aimed at creating a standardized digital protocol for these instruments. The result was MIDI—Musical Instrument Digital Interface—which quickly became an essential component in the realm of music production involving electronic equipment. The launch of Ensoniq Mirage in 1984 as the first affordable MIDI sampler on market allowed even more musicians to exploit this technology’s capabilities.
Throughout its existence, continuous advancements have been made to MIDI technology. After sustaining over thirty years without substantial updates—a remarkable feat—the introduction of MIDI 2.0 represented a significant leap forward in functionality and capability within this field.
One key innovation is known as MPE or “MIDI Polyphonic Expression,” recognized since 2018 by the industry’s own governing body. The MIDI Manufacturers Association (MMA). This breakthrough allows users nuanced control over every single tone when playing chords—an enhancement which imparts upon electronic instruments some measure of expression once thought exclusive to acoustic counterparts.
Why Use MIDI in Music Production?
One of the most significant advantages of MIDI is its versatility. It offers several benefits, including:
The ability to fix errors
Options to alter sound quality
Ways to completely redo sequences
Detailed management over musical aspects such as note pitch, timing, and loudness
In both live performances and studio settings, MIDI proves invaluable. Its ability to connect seamlessly with a variety of electronic instruments and software amplifies its usefulness in creating music.
A benefit worth mentioning is the minimal file size associated with standard midi files. Compared to digital audio files, they are substantially smaller—typically between 200x to 1000x less—which makes them more practical for storage purposes regarding musical content. Their reduced size allows computers easily handle many midi files at once without significantly impacting system performance.
MIDI’s facility for modification and non-destructive edits is crucial in contemporary music production since it empowers artists by allowing:
Creative experimentation without limitations
Simple alterations and reconfigurations of musical parts
Adjustments in tempo or key that do not compromise sound integrity
-Musical expression through real-time manipulation using MIDI controllers during live sessions or recording processes
To sum up, due primarily to its manageable file dimensions along with formidable editing flexibility, the traditional format is integral within realms where musicianship meets technology. Thus cementing standard midi as an indispensable tool among those crafting sounds today.
Key Components of a MIDI Setup
A well-organized MIDI configuration incorporates a range of essential elements that collectively ensure the smooth interchange of signals between devices. The cornerstone components for this setup are the midi ports, midi cables, and midi interfaces which play a pivotal role in facilitating the movement of Midi data. It is critical for individuals aiming to harness MIDI’s full capabilities within their music production pursuits to have an understanding of these key parts.
In terms of distinct functions: Midi IN, OUT and THRU ports regulate incoming and outgoing messages as well as pass-through communications amongst various instruments. While special-purpose midis cords carry this information with high efficiency. MidIs interfaces essentially convert musical instrument digital interface signals so they can be recognized and manipulated by computers. To fully appreciate their significance, let us examine each component more closely regarding its particular purpose and contribution.
MIDI Ports
MIDI ports serve as the channels for transmitting MIDI data and are mainly divided into three distinct types.
MIDI IN: This port enables a device to accept MIDI data originating from an alternate source.
MIDI OUT: Through this port, a device dispatches its own MIDI data onward to another unit.
MIDI THRU: This is instrumental in linking several instruments together—such as synths and drum machines—allowing a sequencer to distribute information across these devices.
For accurate transfer of midi data, it’s imperative that cables are plugged accurately into their designated ports.
MIDI Cables
The essential conduits for transmitting MIDI data within any MIDI configuration are the well-crafted MIDI cables. These cords usually come with five tiny pins and to preserve signal quality, they should preferably not exceed a length of 20 feet. Although classic 5-pin DIN connectors have been standard, contemporary configurations frequently adopt connections like USB, FireWire, or Ethernet for their enhanced adaptability and user-friendliness.
There are TRS MIDI cables that employ Tip, Ring, and Sleeve plug designs to provide diverse connection options tailored to particular equipment requirements.
MIDI Interfaces
MIDI interfaces play a crucial role in:
Translating and transferring MIDI data from your instruments to your computer
Maintaining consistent synchronization, which guarantees the smooth exchange of MIDI information among devices
Facilitating the two-way communication necessary for operating hardware synthesizers using DAW sequencers.
These interfaces frequently employ USB connections, rendering them an adaptable component within any studio configuration.
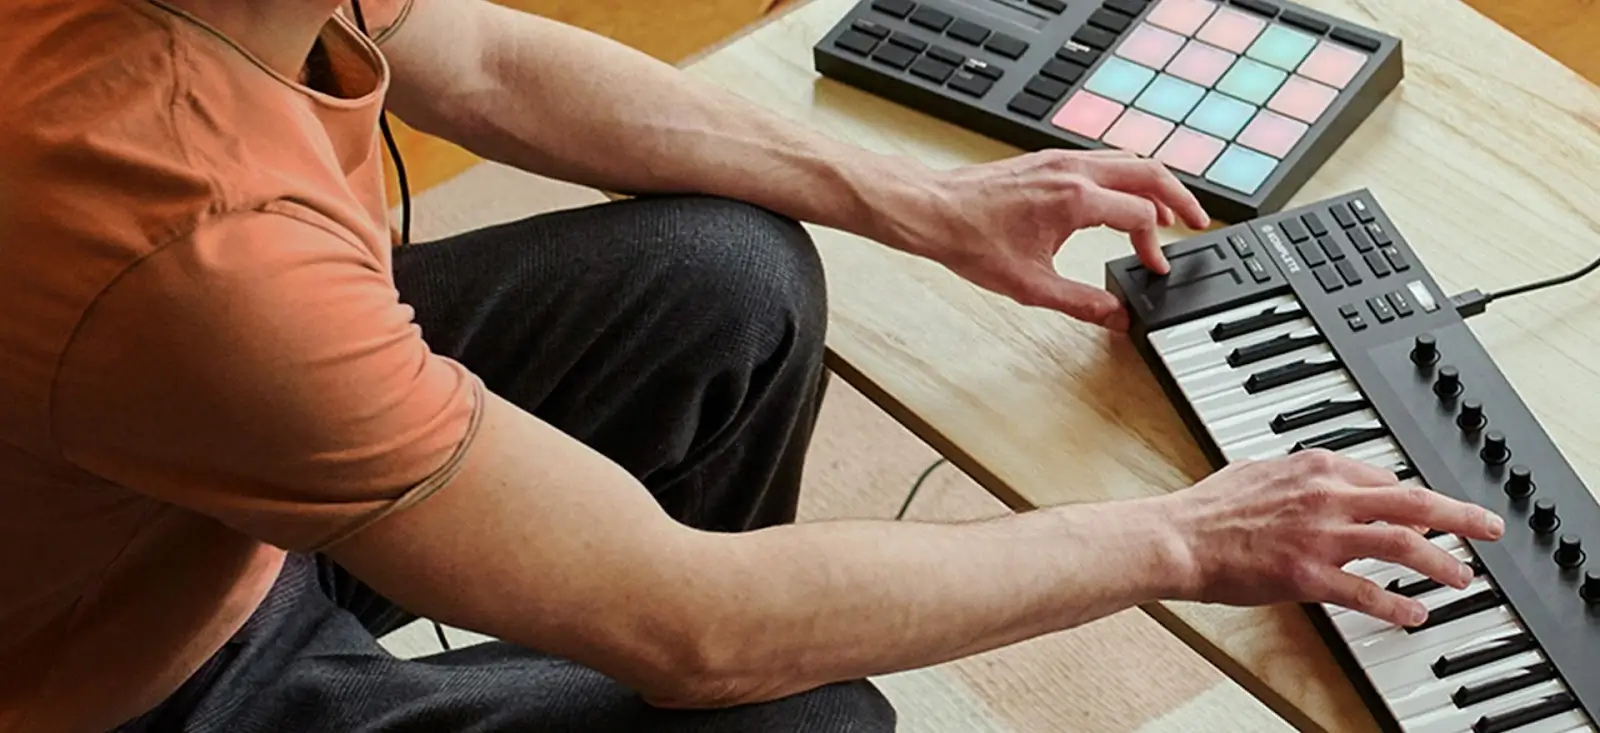
MIDI Controllers and Instruments
A device that outputs MIDI data and facilitates the manipulation of electronic musical instruments, either software or sound modules, is known as a MIDI controller. These devices span from straightforward keyboard layouts to more intricate systems complete with dials, faders, and touchpads for fine-tuning sonic elements. Novation’s MIDI controllers are eminent examples engineered to enable hands-on management of both hardware and software synthesizers. MIDI controllers grant artists the ability to seamlessly operate virtual instruments within digital audio workstations (DAWs), thus expanding their artistic potential.
On the other hand, MIDI-equipped instruments are designed to produce sounds when prompted by MIDI data. They serve dual purposes in music production and live performances, making them invaluable assets for musicians. The scope of these musical tools covers everything from hardware such as vintage synths and drum machines to smoothly running different plugins.
Types of MIDI Controllers
In the realm of music production, there is a diverse array of MIDI controllers designed to suit specific requirements. Notable varieties include:
The MIDI keyboard, which offers velocity-sensitive keys and customizable knobs for playing notes and adjusting controls
Drum pads, developed for crafting beats on the fly
Fader banks that allow tactile interaction with mixing processes
Equipment such as the Novation Launchkey and Launchpad series provides artists with tangible interfaces to activate notes and tweak audio parameters. With their extensive customization capabilities, these controllers have become indispensable instruments for any music producer’s arsenal.
Using MIDI Instruments
Utilizing MIDI instruments within the realm of music production and during live performances opens up a myriad of inventive options. MIDI has the capability to manipulate multiple apparatuses, including lighting setups, drum machines, and synthesizers. Through filters and envelopes found in synthesizers and samplers, one can modify sound color (timbre) and automate its developmental progression temporally.
The adaptability afforded by MIDI instruments renders them an essential tool for artists in both recording studios and concert environments. This allows performers to effortlessly orchestrate sophisticated and vibrant musical shows.
MIDI Messages and Events
MIDI messages serve as a set of commands that direct recipient devices in sound creation and modification, though they themselves do not produce any auditory output. These instructions encompass:
Note-On and Note-Off signals that determine the initiation and cessation of musical notes
Control Change commands that modify real-time parameters such as modulation and volume
Program Change signals which facilitate smooth transitions among different instrument tones within an individual device.
Messages for Pitch Bend allow altering the tone’s pitch to imitate effects like vibrato. Meanwhile, Aftertouch messages offer nuanced control over elements including filter modulation or vibratio intensity. Grasping these distinct MIDI message types is crucial for maximizing the capabilities of MIDI technology in music production, providing detailed command over one’s musical creations.
Editing and Manipulating MIDI Data in DAWs
Digital Audio Workstations (DAWs) allow you to convert MIDI sequences into audio, which not only conserves CPU power but also ensures smoother playback performance. These systems serve as central nodes that house all MIDI information. This simplifies the task of handling intricate compositions.
DAWs are a fundamental part of the modern music-making process. Inside your DAW, you can:
Utilize the piano roll for sequence edits
Manually insert MIDI notes into tracks
Modify note attributes like length and velocity to refine your musical expression
Apply quantization features to synchronize MIDI notes with a grid, delivering precise timing for a more professional sound.
Assign control parameters from your MIDI controller to software operations, enhancing both workflow efficiency and artistic exploration.
Tweak virtual instrument settings linked with MIDI tracks to meticulously sculpt tones.
Advanced MIDI Techniques
The realm of music production is constantly evolving, and advanced MIDI techniques are at the forefront of this transformation. The technique known as MIDI Polyphonic Expression (MPE) revolutionizes how multidimensional controllers manipulate various note parameters via software, vastly improving the expressive potential of digital instruments.
MIDI Polyphonic Expression (MPE)
MIDI Polyphonic Expression, or MPE, enhances the capabilities of MIDI by facilitating independent control over each note. This advancement permits musicians to manipulate aspects such as pitch and timbre with greater precision while playing a note, thereby granting electronic instruments an expressiveness on par with their acoustic counterparts.
Electronic instruments like the ROLI Seaboard and LinnStrument are specifically engineered to fully leverage MPE. These tools provide unmatched command over all aspects of a musician’s performance.
Sequencing and Automation
A MIDI sequencer facilitates the organization and execution of a sequence of MIDI instructions. It retains MIDI information for management, editing, playback purposes, and transmits this data across various
Automation refers to the process of programming variations in different parameters over time—for instance, adjusting volume or panning angles—thereby increasing the musical expression and injecting dynamic shifts into a composition. Such control is crucial for producing music that sounds refined and professional.
Common MIDI Setups for Music Producers
Understanding common MIDI setups can aid in workflow optimization, whether you’re a beginner or an experienced producer. One of the simplest and most common setups involves a MIDI keyboard connected to a computer running a DAW. This configuration is ideal for home studios, offering a portable and powerful solution for creating and manipulating music. Enhance your creative capabilities with MIDI controllers that come equipped with assignable features such as knobs, pads, and sliders. These can be easily integrated into your DAW to provide greater flexibility and control over your music production.
For more advanced configurations, a computer, MIDI interface, and external MIDI instruments like hardware synthesizers or samplers can be used. Hardware-focused setups often involve a hardware sequencer to control MIDI events in conjunction with other equipment like drum machines and synthesizers. These setups provide greater flexibility and control, allowing you to create more complex and dynamic music productions.
DAW and MIDI Controller
Many musicians favor the combination of a MIDI controller and a Digital Audio Workstation (DAW) for its ease of use, portability, and robust capabilities in music production. This pairing significantly improves workflow as it offers tactile interaction with different musical parameters.
For instance, the Novation Launchpad series boasts a 64-pad MIDI grid that is tailor-made for integration with DAWs such as Ableton Live. Such controllers are ideally suited not only to studio production but also excel in live performance environments.
Computer, MIDI Interface, and Synthesizers
For those looking to expand their setup, using a computer, MIDI interface, and external synthesizers offers a more advanced solution. In this configuration, the DAW acts as the main hub for sending and sequencing all MIDI information, while the MIDI interface handles the conversion and transmission of data between the computer and the synthesizers. This setup allows for greater flexibility and control, enabling musicians to:
Create more complex and detailed compositions
Experiment with different sounds and textures
Incorporate external hardware synths into their workflow
Take advantage of the full capabilities of their MIDI instruments
By utilizing this setup, musicians can take their music production to the next level.
Hardware Sequencer, Drum Machine, and Synthesizer
For enthusiasts who enjoy tactile control in their music production process, a setup that includes a hardware sequencer, drum machine, and synthesizer is optimal. The functionality of this configuration allows the hardware sequencer to dispatch MIDI data to both drum machines and synthesizers, enabling the creation of complex rhythms and vibrant auditory environments.
Such an arrangement serves as an alternative to using Digital Audio Workstation (DAW) software for editing MIDI data. It offers a more hands-on approach that can feel more intuitive for crafting and tweaking MIDI information.
Troubleshooting MIDI Issues
Troubleshooting is an essential ability for all musicians, as even the most meticulously designed MIDI setups can encounter difficulties. These issues commonly include:
Problems with connections
Devices configured incorrectly
Defective midi cables
Overburdening a MIDI interface with excessive data, which could corrupt midi messages and cause notes to stick
Mastering the skills needed to pinpoint and rectify these problems will immensely reduce frustration and aid in preserving your artistic momentum.
For any MIDI setup to operate correctly, ensuring solid connections is crucial. Before recording, double-check that every single MIDI cable or USB link is fastened securely and set up properly. Rather than relying on passive hubs which may fail, opt for a powered USB hub equipped with its own adapter, this guarantees consistent device communication.
If all else fails, you may need to employ tools specifically tailored for monitoring MIDI activity. Such resources are invaluable when it comes to diagnosing connection problems as they allow you to see & scrutinize transmitted MIDI data.
Identifying MIDI Problems
Regularly examining the MIDI configuration settings in your DAW and connected equipment is key to pinpointing issues with MIDI. Typical difficulties encountered might consist of:
Issues relating to connection
Mistakes concerning settings for the MIDI channel
Sending an excessive amount of data through a MIDI interface, which can corrupt midi messages and result in sustained notes
Defective cables that could lead to a total cessation of note playing (although this occurrence is uncommon)
Addressing these specific concerns typically rectifies most complications associated with MIDI.
Early detection of these problems can help avoid more severe troubles later on.
Ensuring Proper Connections
To tackle MIDI-related problems effectively, it’s crucial to check the following:
All MIDI cables must be firmly connected to their designated ports.
USB connections should be configured correctly.
The computer and digital audio workstation (DAW) should recognize the MIDI interface.
For optimal performance, connect your MIDI devices using a powered USB hub that comes with an independent power supply adapter. This helps bypass issues often encountered with passive hubs.
Using MIDI Monitoring Tools
Tools for monitoring MIDI are essential when it comes to diagnosing and resolving issues related to MIDI. By providing a way to visualize and dissect the midi data exchanged between instruments, these utilities simplify the process of pinpointing and fixing errors. Programs such as MIDI Monitor on Macs or MIDI-OX for Windows offer comprehensive details about every MIDI message sent, which facilitates confirmation that values of MIDI data align accurately with actions from keys, pads, buttons, or encoders.
Employing such tools can be a significant time-saver by confirming the smooth operation of your setup involving MIDI.
Summary
MIDI is an essential piece of contemporary music production. This blog has comprehensively addressed every aspect required to fully exploit MIDI’s capabilities, from grasping fundamental concepts and configuring your gear to delving into sophisticated methods such as MPE and sequencing. Keep in mind that MIDI extends beyond being merely an apparatus. Immerse yourself, engage in experimentation, and unleash the boundless scope of your musical creativity.
Ready to Elevate Your Music Production Skills?
Whether you’re just starting out with MIDI or looking to perfect your craft, Slate Digital’s Academy offers comprehensive courses designed to help you achieve professional results. Dive deep into music production, learn from industry experts, and gain hands-on experience with our state-of-the-art tools. Don’t miss this opportunity to transform your sound—explore our Academy today and choose the plan that best suits your creative journey.
MIDI is an acronym for Musical Instrument Digital Interface, a protocol that facilitates communication between electronic musical instruments, computers, and various other devices to interface with each other.
In music production, MIDI stands as a crucial tool due to its capacity for adaptability and accuracy alongside maintaining a small file footprint, thus permitting artists to seamlessly alter settings without compromising the fidelity of their work.
MIDI data transmission within a MIDI setup is enabled through essential elements, including interfaces, cables, and MIDI ports, each fulfilling unique roles.
MPE, or MIDI Polyphonic Expression, advances the field of music production by allowing nuanced and continuous control over pitch bend, timbre, and additional intricacies on a per-note basis within chords. This provides increased expressive capabilities for electronic instruments.
When addressing typical MIDI problems, it’s crucial to examine your MIDI setup options, verify that the connections are correct, and utilize tools designed for monitoring MIDI to pinpoint any issues with data transmission.
When you’re part of the Slate Digital community, you’re not just getting next-level audio tools—you’re connecting with a legacy of excellence through our partnerships with industry icons like Solid State Logic (SSL) and Harrison Audio. These aren’t just brands; they’re the legends that have defined the sound of music and film for generations.
Let’s shine the spotlight on SSL for a moment. This isn’t just another brand; it’s the brand. From shaping iconic albums and movie scores to redefining what’s possible in studios of all sizes, SSL has been at the forefront of audio innovation. Their technology is a cornerstone of music and film production, trusted by the best in the business—and by creative minds everywhere.
Here at Slate Digital, we’re not just fans—we’re family. We’re honored to share this connection and stand shoulder-to-shoulder with such a powerhouse. So, let’s dive into the incredible story of Solid State Logic, a brand that’s not just a leader in the industry but a creator of its very foundation.
Solid State Logic: Shaping the Sonic Landscape of Modern Music and Media
When it comes to defining moments in music, film, and broadcast history, Solid State Logic (SSL) has consistently been at the forefront. From iconic hit records to groundbreaking film soundtracks, SSL consoles have been the silent force driving the evolution of sound since the 1970s.
Founded by Colin Sanders in 1969, SSL redefined the very essence of audio engineering, leaving an indelible mark on countless artists, producers, and studios worldwide.
The story of Solid State Logic began in the rolling hills of Oxfordshire, England, where visionary engineer Colin Sanders had an idea that would change the course of audio production forever. Initially focused on creating solid-state switching systems for pipe organs, Sanders’ technical prowess led him to an unexpected pivot.
As the owner of Acorn Studios, he found the era’s mixing consoles lacking in flexibility and control. Not one to settle for “good enough,” Sanders built his own. His first console, the SL 4000 A Series, debuted in 1975, introducing revolutionary features like in-line mixing and early automation. It also introduced the world to SSL’s now-legendary design philosophy: innovation that puts the engineer first.
A Game-Changer for the Industry
However, the real breakthrough came in 1979 with the SL 4000 E Series. It wasn’t just a console; it was a paradigm shift. With features like per-channel compressors and gates and its famous VCA-based bus compressor, the console became an indispensable tool for audio professionals like Trevor Horn and Steve Lillywhite who used SSL consoles to craft some of the most iconic recordings in history.
But the real star of the show was Total Recall. For the first time, engineers could save and reload all console settings with the push of a button. What seems standard today was groundbreaking in 1979, saving countless hours and bringing unparalleled efficiency to the creative process. Studios equipped with SSL desks quickly became the gold standard, with artists and producers flocking to work their magic on these sonic powerhouses.
The SSL Sound: Punch, Power, and Presence
SSL consoles didn’t just make life easier — they made music sound better. Engineers found that pushing the SL 4000 E Series and later the 4000 G Series added punch and harmonic richness to their mixes. This sonic signature became synonymous with professional-grade music production, shaping the sounds of artists like Peter Gabriel, Madonna, and Phil Collins—and more recently, Daft Punk, Dr. Dre, and Jay-Z.
For many, the defining feature was the iconic stereo bus compressor, a tool capable of turning a good mix into a great one. With just a few tweaks, the compressor added cohesion and energy, giving tracks a radio-ready finish that jumped out of the speakers.
SSL consoles quickly became fixtures in the world’s most prestigious studios, including Abbey Road, The Power Station, and Townhouse Studios. These legendary spaces became the birthplace of countless hit records, with SSL consoles as the backbone of the production process.
From Prince’s Sign o’ the Times to Phil Collins’ Face Value and Peter Gabriel’s So, SSL consoles were integral to the creation of music that defined an era. Rock and metal legends like Rush (Moving Pictures), Metallica (Master of Puppets), and Rage Against the Machine (Rage Against the Machine) pushed their genres to new heights using SSL’s tools.
By the mid-1990s, Billboard magazine reported that 83% of number-one singles had been mixed on an SSL console, highlighting the brand’s unparalleled influence on the music industry. Even into the modern era, artists like Adele (21), My Chemical Romance (The Black Parade), and Muse (Showbiz) relied on SSL to deliver polished, powerful sounds.
The power of SSL consoles lies in their ability to bring artistic visions to life, and they became the go-to choice for producers like Trevor Horn, Steve Lillywhite, and Tom Lord-Alge. Horn’s work on The Lexicon of Love by ABC is an iconic example of how SSL consoles amplified the creativity of their users.
Broadening Horizons: Film and Broadcast
While SSL’s initial impact was felt in music studios, its influence soon extended to film and broadcast. In the 1980s, SSL introduced smaller consoles tailored for post-production and film scoring. Hollywood sound stages quickly adopted these consoles, recognizing their ability to deliver unmatched clarity and efficiency.
The 5000 F Series console brought automation and a level of fidelity that transformed Hollywood sound stages. SSL consoles powered blockbusters like Jurassic Park and The Matrix, where their ability to manage massive, multi-layered audio tracks proved invaluable. Meanwhile, their adoption in live broadcasts showcased their reliability and precision in high-pressure environments.
SuperAnalogue: A Leap in Analog Technology
As digital technology began to dominate the industry, SSL doubled down on analog innovation with its SuperAnalogue design. First introduced in the SL 9000 J Series in the 1990s, this technology utilized a capacitor-free signal path to achieve extraordinary clarity and detail. The result was an audio signal path that far exceeded the capabilities of even the most advanced digital converters, offering extremely low distortion and practically linear phase across the frequency spectrum.
SuperAnalogue technology set a new benchmark for audio fidelity, becoming a hallmark of SSL’s flagship products. It was this combination of analog warmth and pristine clarity that kept SSL consoles relevant in an era increasingly dominated by digital tools.
A hallmark feature of SSL consoles has always been the bus compressor, first introduced in the SL 4000 B Series in 1976. Known for its ability to “glue” mixes together, the bus compressor became an essential tool for engineers and producers. Its simple controls and powerful sound made it the go-to choice for everything from subtle compression to bold, punchy mixes.
Over the years, SSL has adapted the bus compressor for a variety of formats, from rack-mounted units to DAW plug-ins. Its enduring popularity speaks to its unique ability to enhance mixes with the signature SSL sound.
Digital Innovation and Hybrid Solutions
In the early 2000s, SSL began integrating analog warmth with digital precision, ushering in a new era of hybrid audio systems. Products like the AWS and Duality consoles combined traditional analog features with advanced hardware DAW control, providing engineers with unprecedented flexibility. These consoles bridged the gap between analog and digital workflows, making them indispensable in modern studios.
SSL’s dedication to innovation extended to smaller studios and home producers. Compact products like the SiX desktop mixer and in 2020, the SSL 2 audio interface brought the company’s signature sound to a new generation of creators. These tools offered professional-quality audio at an accessible price, ensuring that SSL’s legacy would continue to inspire future talent.
Today, SSL remains a leader in the audio industry, constantly evolving to meet the needs of modern creators. Their ORIGIN console, launched in 2019, is a testament to their ability to balance heritage with innovation. Borrowing elements from the classic 4000 Series, the ORIGIN combines classic SSL sound and workflow with modern ‘hybrid’ features, making it a popular choice for professional and project studios alike.
SSL has also embraced the digital revolution with its comprehensive range of premium plug-ins. These software tools bring the iconic SSL sound to DAWs, offering emulations of the company’s classic hardware. From EQs to compressors, the plug-ins provide the same quality and precision and workflow that made SSL famous.
Why SSL Endures
So, what keeps SSL at the top of its game after more than 50 years? It’s more than the technology—it’s the company’s unwavering commitment to the craft. Every product they release, whether it’s a flagship console or an entry-level audio interface, is built with the same philosophy: to empower creators.
The SSL ethos extends beyond gear. The company’s investment in education and partnerships with schools ensures that the next generation of engineers has access to the tools and knowledge needed to thrive.
As technology evolves, SSL’s commitment to innovation, quality, and artistry ensures that its legacy will continue to inspire generations of creators. From iconic albums to groundbreaking films, SSL has not just shaped the sound of an industry—it has shaped the soundtrack of our lives.
SSL’s full suite of plug-ins is available in partnership with Slate Digital as part of the Complete Access Bundle.
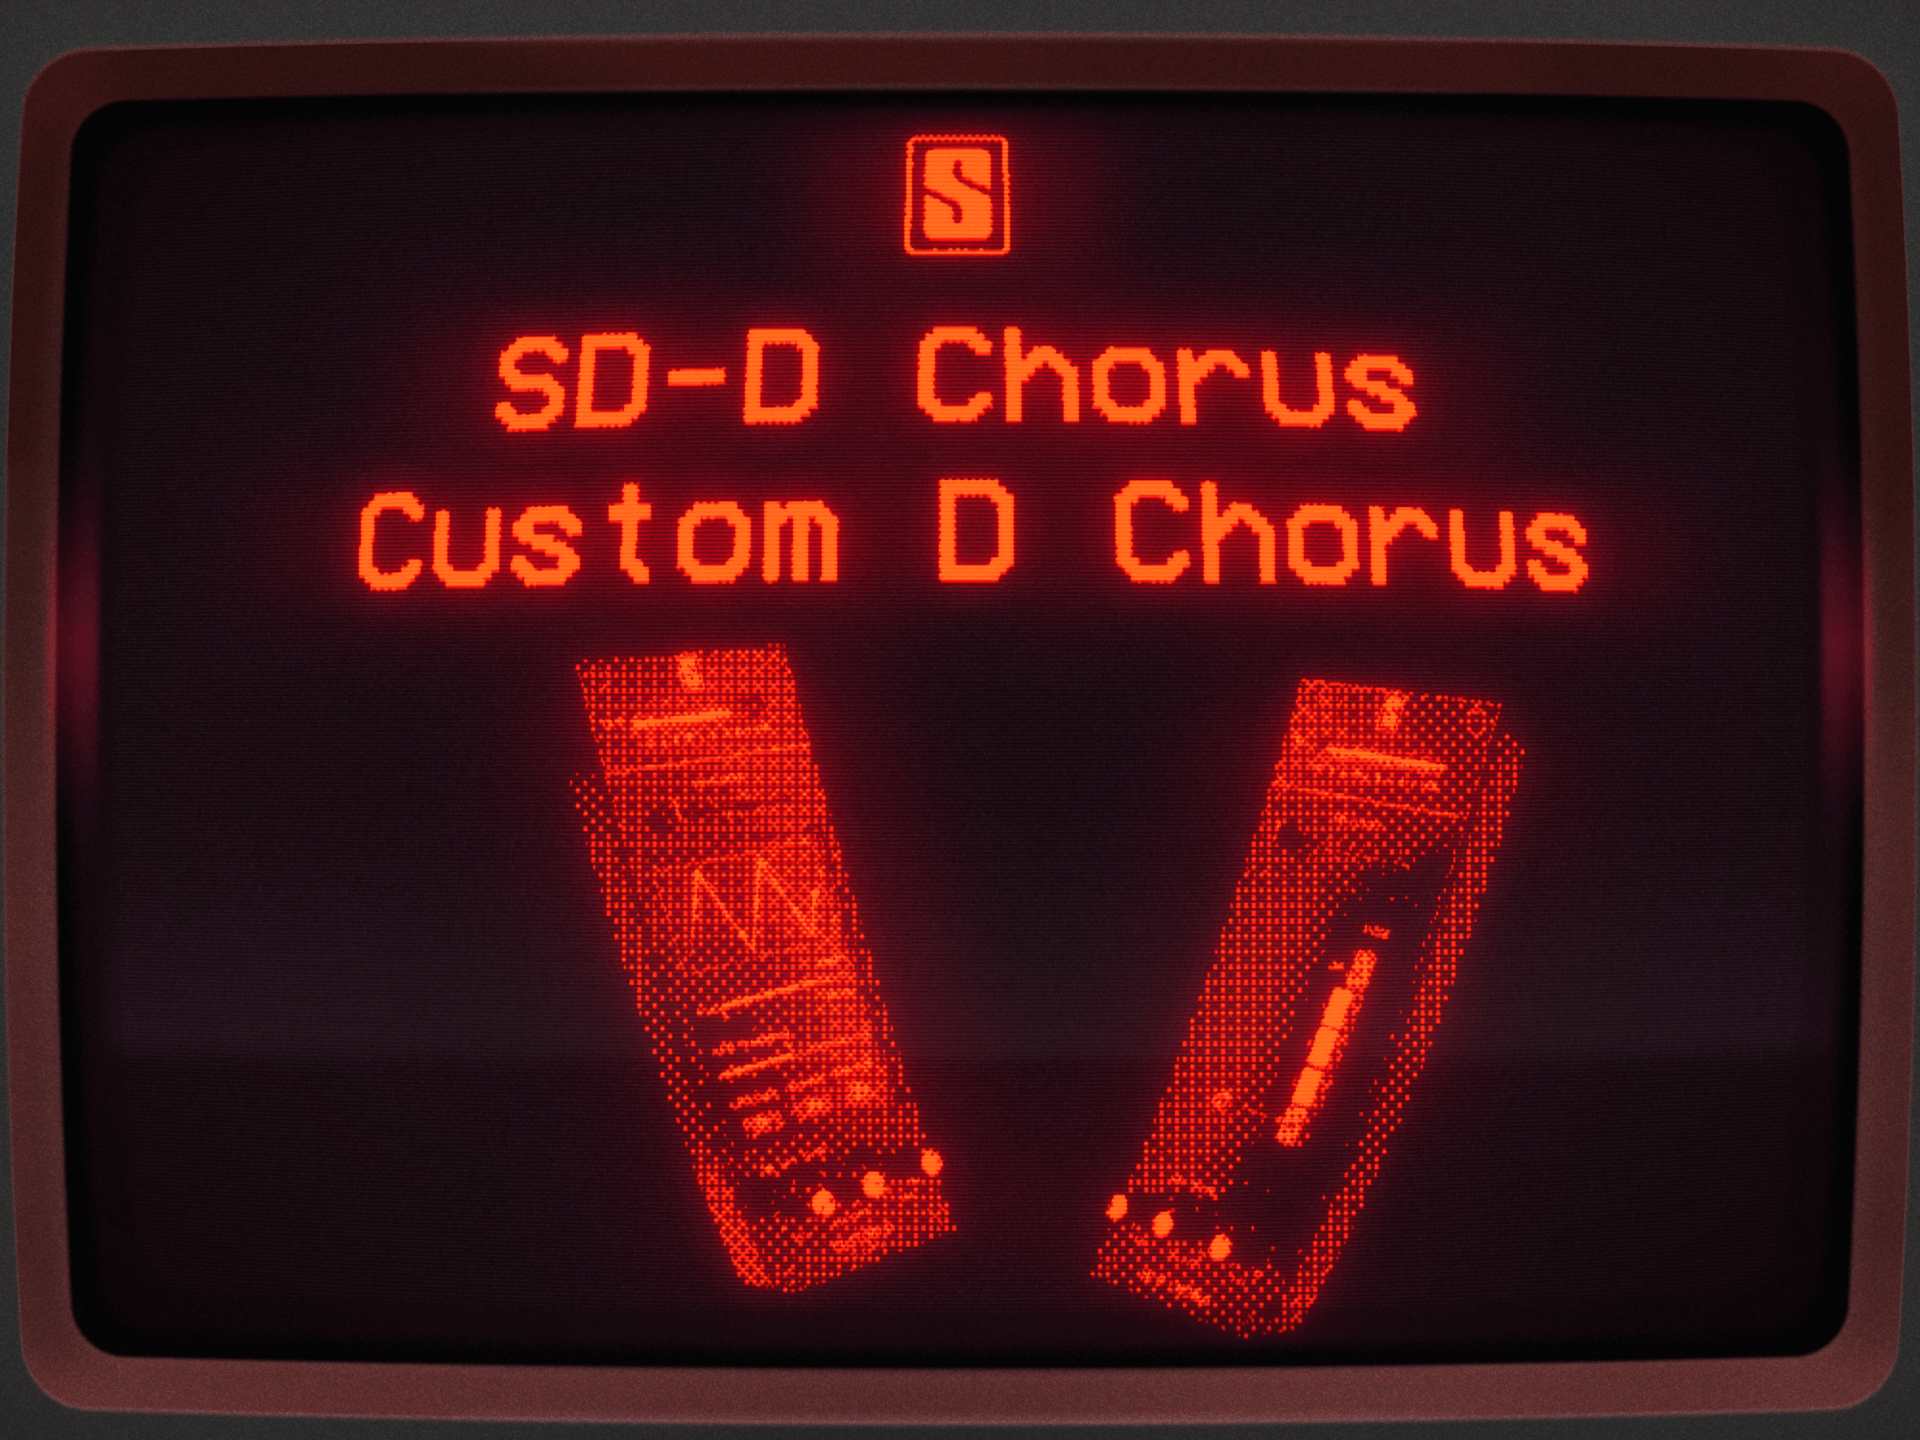

 SD-D Chorus is a 1:1 recreation of a beloved chorus from the late 1970s. Featuring the four modes from the original hardware, users can also experiment with different combinations for more sonic possibilities. The intensity of the effect can be adjusted, too—something that wasn’t possible on the original hardware.
  Custom D Chorus takes the classic tone of the original hardware and gives users an unprecedented amount of control over their resulting signal. They can adjust the depth, delay, and rate of the LFO to their taste, set or bypass the cutoff frequency of their effected signal, adjust the shape of the LFO, or even randomize it for a totally unique result.